Replacing Tub Faucet: A DIY Step-by-Step Guide
Learn how to replace a tub faucet with this comprehensive, step-by-step guide. From shutting off water to testing for leaks, Faucet Fix Guide walks homeowners through safe, accurate faucet installation and maintenance.

Goal: replace tub faucet safely and effectively. You’ll remove the old faucet, choose a compatible replacement, install with correct shutoff valves, and test for leaks. This guide covers mounting types, sealants, and basic troubleshooting. Before you start, gather the right tools and turn off the water supply. According to Faucet Fix Guide, taking accurate measurements reduces delays and waste.
What replacing tub faucet involves
Replacing tub faucet is a common DIY project that can refresh a bathroom and stop leaks. The task involves removing the old faucet assembly, selecting a compatible replacement (consider mounting type, valve compatibility, finish, and spout style), and installing the new unit with proper seals and shut-off supply lines. The process requires basic plumbing tools and some patience. According to Faucet Fix Guide, planning and measurement accuracy reduces call-backs and future leaks. In many homes, especially older houses, you may encounter stubborn mineral buildup, corroded hardware, or unusual trim. If you see extensive corrosion behind the escutcheon or the pipe connections rotate or leak when touched, pause and evaluate whether you should call a pro.
There are several common configurations you might encounter: deck-mounted faucets with 2, 3, or 4 holes; wall-mounted fixtures behind the tub; and single-handle or dual-handle designs. The choice affects how you remove the old unit and what replacement kit you buy. Start by identifying your mounting type and the rough-in spacing on the wall or deck to ensure compatibility. Don’t assume a one-size-fits-all faucet will work; a mismatched mounting pattern will lead to leaks, wobbly trim, and future headaches. The goal is a tight seal, smooth operation, and a finish that matches your bathroom style.
Safety comes first. Always work with valves fully shut, protect your floor with towels or a bucket, and unplug power if you’re near any electrical outlets. If your tub is part of a larger shower enclosure, check the shower arm and spout as well; sometimes the spout threading and valve body require different adapters. If you suspect the plumbing behind the wall is deteriorating, or you find corroded pipe threads, consider calling a licensed plumber. This reduces the risk of water damage and ensures the fixture is correctly installed to code. Remember, taking measurements before you buy saves time and money and reduces the risk of a return trip to the hardware store.
To keep this guide practical, we’ll cover the most common tub faucet types and give you a clear path to a successful replacement. Whether you’re upgrading to a more durable finish like brushed nickel or chrome, or you want a modern single-handle setup for easier temperature control, the process remains fundamentally the same: plan, measure, disconnect safely, install, and test for leaks. Throughout, think about future maintenance—easy-to-clean finishes, accessible shut-off valves, and readily available replacement cartridges can save you time later.
Tools and materials you’ll need
Before you begin replacing tub faucet, assemble the essential tools and materials. Having everything ready avoids frustrating mid-project trips to the hardware store. Here’s a practical list that covers most residential tubs:
- Adjustable wrench (2 if you have tight spaces)
- Basin wrench for tight under-mount connections
- Philips and flathead screwdrivers (sizes #1 and #2 commonly fit hardware screws)
- Hex/Allen key set (for set screws on some handles)
- Teflon tape (plumber’s tape) for threaded fittings
- Plumber’s silicone sealant or caulk for around the escutcheon
- Replacement tub faucet kit compatible with your mounting type (deck-mount or wall-mount)
- Replacement supply lines or connectors if needed
- Bucket or old towels to catch drips
- Cleaning rags or paper towels for wipe-downs
- Flashlight or headlamp to illuminate tight spaces
- Measuring tape to verify hole spacing and rough-in
- Optional: plumber’s putty for older fixtures
Pro tip: take photos of the old setup before you start so you have a reference for where hoses and screws went. This makes reassembly faster and reduces guesswork. If you’re replacing an old fixture with a different mounting pattern, you may also need an adapter kit.
Safety warning: never force fittings or use excessive torque; overtightening can crack ceramic cartridges or strip threads, leading to leaks and costly repairs.
Choosing the right replacement faucet
Choosing the right replacement faucet is more than picking a pretty finish. Start by confirming compatibility with your tub’s mounting style and the valve type behind the wall (compression, cartridge, or ceramic disc). If you have a three-hole deck-mount setup, you’ll typically need a 4-inch or 8-inch centers spacing faucet with a matching escutcheon. For single-handle systems, verify the trim can cover the existing holes and that the valve body (behind the wall) supports the new cartridge you’re purchasing. Finish options—chrome, brushed nickel, matte black, or oil-rubbed bronze—affect not only aesthetics but also durability and stain resistance.
Consider the faucet’s cartridge type and replacement cost. A durable cartridge reduces future maintenance, and some manufacturers offer lifetime warranties on cartridges with standard DZR materials for corrosion resistance. If you plan to upgrade to a water-saving model, check the flow rate (measured in gallons per minute, or GPM) and ensure it complies with local codes. Also assess spout reach and height to prevent water from splashing onto the vanity or backsplash. The Faucet Fix Guide approach emphasizes buying from reputable brands with readily available replacement parts, so you’re not stuck if parts wear out. Finally, confirm the faucet’s warranty terms and whether the mounting hardware is included—skipping this can lead to extra trips to the store.
If you’re replacing a tub faucet with a shower head, ensure the new unit includes a compatible shower arm and diverter. For wall-mounted spouts, measure the distance from the valve to the tub edge to prevent a cramped look. Where possible, bring the old faucet to the store to compare dimensions; this simple step reduces surprises at home. In short, take a few careful measurements, verify compatibility, and choose a finish that matches your bathroom’s design. Your future maintenance will thank you.
Prep work: turning off water, removing trim, and freeing the old faucet
Begin by shutting off both hot and cold water supplies at the nearest valves, then turn on the tub faucet to relieve pressure and drain residual water. Place towels and a bucket under the work area to catch drips. Remove the handle by loosening the set screw with the appropriate Allen key or screwdriver, then lift off the handle and set it aside.
Next, remove the escutcheon plate or decorative trim that hides the valve and mounting nuts. Use a basin wrench or adjustable wrench to loosen and remove mounting nuts while supporting the faucet body from above to prevent it from dropping. If the old faucet is stubborn, apply a little penetrating oil to corroded threads and let it sit for a few minutes before retrying. Once free, carefully detach the supply lines from the valve and cap them to prevent water from splashing.
Finally, inspect the valve body and the tub opening for mineral buildup, corrosion, or damaged threads. Clean the surfaces with a rag and a light degreaser if needed, making sure to dry everything thoroughly before you attach the new faucet. This step reduces the risk of leaks caused by debris interfering with seals and gaskets. Remember to keep track of every screw, washer, and spacer—you’ll need them during reassembly.
Step-by-step overview: how the process unfolds
The core replacement process follows a logical sequence: shut off water, remove old components, prep mounting surfaces, install the new faucet, connect the lines, and test. For most standard tub faucet replacements, you’ll typically remove the old faucet, apply Teflon tape to male threads, fit the new faucet body, tighten mounting hardware, reattach supply lines, and finally test. While steps can vary slightly by model, the fundamental actions stay the same.
As you work, consult the manufacturer’s installation manual for torque specs and sequence recommendations. If your unit uses a single-handle cartridge, you may need to swap the cartridge first before installing the trim. Keep a small container for screws to prevent loss, and dry-fit components before you apply sealant to ensure the parts align correctly. Finally, check for leaks at every connection after turning the water back on and allow the system to fill and bleed air.
In tricky installations—such as tight spaces behind a wall—use a flashlight to locate the valve and plan your tool placement. Don’t rush: taking a few extra minutes to align parts will prevent leaks and misfits. If anything feels brittle or misaligned, stop and reassess rather than forcing a part into place. A well-planned replacement saves time and reduces warranty issues later.
Installation considerations by faucet type
Deck-mounted two- or three-hole faucets require precise hole spacing and escutcheon coverage. If you’re replacing with a single-handle deck-mount model, ensure the new trim covers existing holes. Wall-mounted tub faucets demand careful access to the valve body and may require longer supply lines or depth adjustments. In both cases, verify that the new faucet’s cartridge and valve are compatible with your house’s water pressure and supply line diameters (usually 1/2-inch compression fittings in residential settings).
For modern, water-efficient models, check the recommended flow rate and ensure the faucet complies with local codes. Some models pair with universal trim kits, which can simplify matching finishes across bathroom fixtures. If your tub uses a diverter for a shower head, make sure the new faucet has a compatible diverter valve to avoid compatibility headaches. Finally, review warranty terms: a few manufacturers insist on professional installation for warranty validity, while others permit DIY installation with proper care. The key is compatibility, proper sealing, and robust support parts for long-term reliability.
Post-installation tests and maintenance tips
With all connections tight and sealant cured, slowly open the shut-off valves and run both hot and cold water through the faucet. Look for steam or air pockets and then check every connection for leaks. Wipe away any excess sealant and recheck after the area has had a few minutes to settle. If you notice a persistent leak at a joint, tighten the connection slightly and reapply Teflon tape. For finish longevity, wipe the faucet with a microfiber cloth after use to minimize water spots.
Maintain accessibility by keeping the deal sufficient; label shut-off valves and avoid burying the supply lines behind heavy cabinetry. Periodic checks of the cartridge and the escutcheon will extend the life of your faucet. If you notice mineral buildup or a decrease in water pressure after replacement, consider flushing the lines or using a descaling solution per the manufacturer’s guidelines. Regular maintenance reduces the likelihood of future leaks and keeps the fixture looking new longer.
Tools & Materials
- Adjustable wrench(20-24 mm opens wide; avoid overtightening plastic fittings)
- Basin wrench(For tight clearance under tub spouts)
- Hex/Allen key set(Needed for set screws on some handles)
- Phillips screwdriver(Sizes #1 or #2 depending on screws)
- Flathead screwdriver(Useful for prying trim carefully)
- Teflon tape (plumber’s tape)(Wrap clockwise 3-4 times on threads)
- Plumber’s silicone sealant(Seal around escutcheon if needed)
- Replacement tub faucet kit(Compatible with mounting type and valve)
- Bucket or towels(Catch water, keep work area dry)
- Cleaning rags(Wipe surfaces and dry thoroughly)
- Flashlight(Inspect hard-to-see spaces)
- Measuring tape(Confirm hole spacing and reach)
- Plumber’s putty(Optional for aged fixtures)
- Supply line connectors(Only if your lines need replacement)
Steps
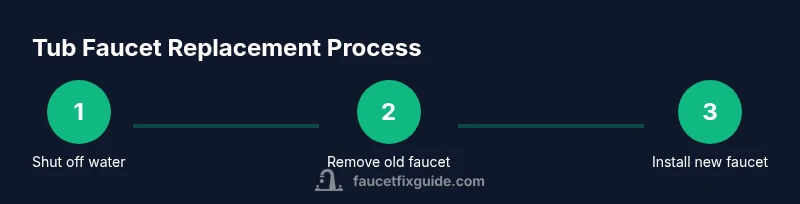
Estimated time: 45-90 minutes
- 1
Shut off water and prepare area
Close both hot and cold valves, then open the tub faucet to drain residual water. Place towels and a bucket under the work area. This prevents unexpected splashes and gives you a dry workspace.
Tip: Take photos of existing connections before disconnecting for reference. - 2
Remove handles and escutcheon
Unscrew the handle set screw with the appropriate tool and lift off the handle. Remove the escutcheon plate carefully to expose the valve and mounting hardware. Keep small parts in a labeled container.
Tip: Label screws by location to simplify reassembly. - 3
Disconnect supply lines
Use a basin wrench to loosen and detach hot and cold supply lines from the valve. Have a bucket ready for any remaining water and cap the lines to prevent drips.
Tip: Check for mineral buildup on threads; clean them before reassembly. - 4
Prep mounting surface and apply tape
Clean the valve threads and mounting surface. Apply Teflon tape to male threads to ensure a tight seal before attaching the new faucet.
Tip: Wrap the tape in the direction of tightening to prevent unraveling. - 5
Install new faucet and connect lines
Position the new faucet, tighten mounting nuts hand-tight then with a wrench to snug, and reconnect supply lines. Use silicone sealant around the escutcheon if recommended by the manufacturer.
Tip: Avoid overtightening to prevent damage to threads or the faucet body. - 6
Test for leaks and finalize trim
Slowly turn the water back on and check all connections for leaks. Bleed air by running hot and cold water, wipe away excess sealant, and install the escutcheon and handle.
Tip: Test both hot and cold water separately to confirm even flow and secure seals.
Frequently Asked Questions
Do I need a professional to replace a tub faucet?
If you have basic plumbing skills and access to shut-off valves, you can handle many tub faucet replacements. Complex setups behind walls or corroded pipes may require a licensed plumber to prevent water damage and ensure code compliance.
If you’re comfortable with basic plumbing, you can try it. For tricky or corroded setups, hire a licensed plumber.
What tools are essential for replacing tub faucet?
You’ll typically need an adjustable wrench, basin wrench, screwdrivers, Teflon tape, and the replacement faucet kit. If space is tight, a flashlight and a measuring tape save time.
The basic toolkit is an adjustable wrench, screwdrivers, Teflon tape, and your new faucet kit.
How do I know which faucet will fit my tub?
Check the mounting type (single-hole, three-hole, or wall-mounted) and measure hole spacing. Verify the valve behind the wall matches the cartridge type of the new faucet and confirm thread sizes for supply lines.
Match mounting style and valve compatibility for a proper fit.
Can I reuse my old supply lines?
Only if they’re in good condition, the same size, and compatible with the new faucet. It’s often safer to replace with new lines to prevent future leaks.
Reuse only if they’re in good shape; otherwise replace.
What are common leaks after replacement?
Leaks usually occur at threaded connections or around the escutcheon. Recheck seals, tighten fittings slightly, and reapply plumber’s tape as needed.
Leaks usually come from connections; reseal and recheck.
How long does replacement take for a typical DIYer?
Most DIY replacements take 45-90 minutes, depending on space, mounting type, and familiarity with fixtures.
Expect about 1 to 1.5 hours for a typical job.
Watch Video
Top Takeaways
- Plan and measure before buying.
- Shut off water and drain the line first.
- Verify mounting type and hole spacing.
- Seal joints properly and test for leaks.
- Keep finishes and trim aligned for a professional look.