Changing Shower Valve: A Practical Home Guide
Learn how to safely replace a shower valve, identify valve types, select replacements, and test for leaks. This comprehensive guide is designed for homeowners and DIY enthusiasts tackling valve upgrades and repairs in the bathroom.

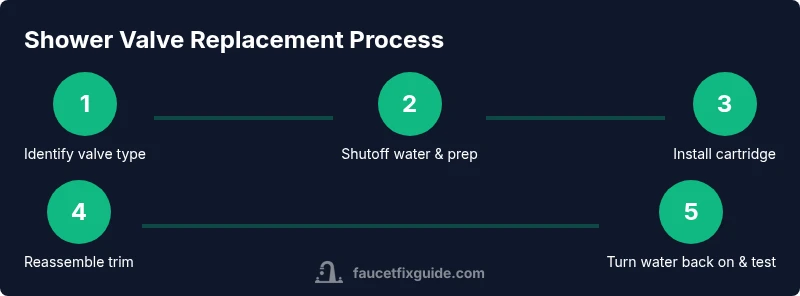
You will learn how to change a shower valve, including identifying the valve type, selecting a compatible cartridge or valve, and completing the replacement from start to finish. Start by turning off the water supply, removing the trim and handle, accessing the valve, installing the new cartridge or valve body, reassembling the trim, and then testing for leaks and proper temperature control. Follow safety guidelines and manufacturer instructions throughout the process.
Why changing shower valve is a smart upgrade
Changing the shower valve is a foundational bathroom fix that can restore consistent water temperature, prevent ongoing leaks, and improve overall water efficiency. Over time, worn cartridges, degraded seals, and mineral buildup can cause temperature fluctuations or drips that waste water and frustrate users. A well-executed valve change reduces the chance of leaks behind walls and extends the life of the faucet hardware. For homeowners, tackling this task with a structured plan often saves money and minimizes disruption compared to hiring a plumber for every minor adjustment. The phrase changing shower valve often appears in home-improvement literature because the valve is the core control point for hot and cold water in most showers.
Valve types you’ll encounter in typical showers
Most residential showers use one of three main valve types: cartridge valves, ball valves, and compression valves. Cartridge valves use a replaceable cartridge to control flow and temperature; ball valves use a ball assembly inside the body with seats and springs; compression valves rely on washers that compress to seal. Anti-scald or thermostatic valves add a temperature-regulation feature but require compatible cartridges or bodies. Identifying the valve type usually starts with your handle style (rotational, push-pull, or lever), the cartridge shape, and, if accessible, the markings on the escutcheon or cartridge. Knowing the type helps you source the correct replacement part and ensures proper installation without additional testing.
Safety and prep before you start
Safety comes first. Before touching any plumbing, locate and shut off all relevant water supplies to the shower and adjacent fixtures. Relieve pressure by opening a hot or cold line after shutoff. Gather PPE such as gloves and eye protection, and lay towels and a bucket nearby to catch drips. If you’re working in a shared dwelling, inform others and post a brief note so they know not to run water during the project. Documenting the current setup with photos can help you confirm orientation and orientation of new parts later.
Tools, parts, and sourcing you’ll need
Having the right tools reduces frustration and speeds up the job. Essential items include an adjustable wrench, a screwdriver set, a pair of pliers, replacement cartridge or valve assembly compatible with your model, plumbers tape or silicone sealant, gasket material if required, a utility knife, and a clean rag for wipe-downs. Depending on the valve, you may also need an identifying label or model number, an O-ring kit, and penetrating oil for stubborn fasteners. It’s wise to bring the old cartridge to the hardware store to verify the exact replacement. If you’re unsure about compatibility, consult the manufacturer’s guide or a plumbing professional.
Accessing the valve: trim, escutcheon, and back-to-wall configurations
Gaining access requires careful removal of trim, handle, and escutcheon plates while avoiding damage to nearby walls or finishes. Start by removing the set screw or retaining clip, then lift the handle away. Remove the escutcheon with a small pry tool or screwdriver, taking care not to scratch the wall finish. If you encounter a back-to-wall configuration, you may need to remove surrounding tiles or drywall to access the valve body safely. Document screw sizes and locations to help reinstallation later.
Testing and maintenance follow-up
After installing the replacement cartridge or valve, reassemble the trim and verify the handle operates smoothly through its full range. Reconnect the water, slowly turn on both hot and cold supplies, and check for leaks around the escutcheon, cartridge, and valve stem. If leaks persist, reseal joints with plumber’s tape and re-tighten, avoiding over-tightening that could damage threads. Finally, test both hot and cold water for temperature consistency and adjust as needed. Establish a simple maintenance routine to flush lines annually and inspect seals for signs of wear.
Tools & Materials
- Adjustable wrench(Range to fit valve nuts and fittings (usually 6–10 inches) )
- Screwdriver set(Phillips and flat-head for handle/escutcheon screws )
- Replacement cartridge or valve assembly(Bring model number or take old part for matching )
- Pliers(Use for stubborn components and retaining clips )
- Penetrating oil(Helpful for corroded screws (apply and wait 5–10 minutes) )
- Plumbers tape (Teflon tape) or pipe dope(Seal threaded connections )
- Silicone sealant (optional)(Use sparingly around escutcheon edges )
- Gasket material or new escutcheon gasket(Check if your trim kit includes a gasket )
- Rags and a bucket(Clean up drips and catch water during disassembly )
- Safety gloves and eye protection(Protect hands from sharp edges and chemicals )
- Camera or notebook(Document valve and trim setup for reassembly )
Steps
Estimated time: 60-120 minutes
- 1
Identify valve type and model
Examine the handle type and, if accessible, the cartridge shape to confirm whether you have a cartridge, ball, or compression valve. Look for model numbers on the cartridge or valve body, and consider bringing the old cartridge to the store for exact replacement. Understanding the correct type prevents ordering the wrong part and saves a return trip.
Tip: Take close-up photos of the valve from multiple angles before disassembly. - 2
Shut off water and relieve pressure
Close the home shut-off valves that serve the shower. Open the faucet to release any built-up pressure in the line. If you don’t have separate shutoffs, shut off the main supply and verify the water is off.
Tip: Double-check by turning on the shower to confirm no water flow before proceeding. - 3
Remove trim and handle
Unscrew the handle set screw and slide off the handle, then remove the escutcheon plate to expose the valve stem. Note screw sizes and positions for reinstallation.
Tip: If screws are tight, apply penetrating oil and work gently to prevent stripping. - 4
Access the cartridge or valve body
Carefully expose the cartridge or valve stem by removing any retaining clip or nut. Use the appropriate tool to lift the cartridge straight out without twisting or bending delicate internal parts.
Tip: Keep track of any springs or seals that come out with the cartridge. - 5
Install the replacement cartridge/valve
Compare the new part with the old one to ensure correct fit. Lubricate O-rings as recommended by the manufacturer and insert the cartridge or valve assembly in the same orientation as the old part.
Tip: Do not force the cartridge; if it doesn’t seat with moderate pressure, re-check alignment. - 6
Reassemble the trim
Replace the escutcheon and handle, ensuring alignment marks line up with the valve stem. Reattach any screws snugly but avoid over-tightening.
Tip: If you replaced the valve body, verify trim alignment before final tightening. - 7
Restore water and test for leaks
Turn the water back on gradually. Check all joints and the escutcheon for leaks. Test hot and cold settings across the full range to confirm consistent temperature control.
Tip: Run the shower for several minutes to flush any debris from the line. - 8
Final checks and maintenance
Inspect for any slow leaks and adjust seals or gaskets as needed. Consider applying silicone sealant sparingly around the escutcheon if gaps are present. Schedule periodic checks to prevent future issues.
Tip: Keep a small inventory of common cartridge sizes for quick future replacements.
Frequently Asked Questions
Do I need to turn off both hot and cold water before starting the replacement?
Yes. Turn off the hot and cold supplies to the shower and relieve pressure by running a fixture briefly. If your home has individual shutoffs for the bathroom, use those; otherwise shut off the main.
Yes. Turn off both hot and cold water and release pressure before you begin.
Can I replace just the cartridge or do I need a full valve replacement?
Most common cartridge valves can be replaced by swapping the cartridge alone. If the valve body is damaged, corroded, or the cartridge is not available, you may need to replace the entire valve assembly.
Often you can replace the cartridge, but some valves require a full replacement.
What tools are essential for a shower valve replacement?
Essential tools include an adjustable wrench, screwdrivers, pliers, replacement cartridge, plumbers tape, and a rag. Having penetrating oil can help with stubborn screws.
You’ll need basic hand tools plus a replacement cartridge or valve assembly.
How do I know which replacement cartridge to buy?
Check the valve manufacturer and model number on the current cartridge or valve body. Bring the old cartridge to the hardware store or look up the model online to ensure compatibility.
Find the model number and bring the old part to confirm the right cartridge.
Is it safer to DIY or hire a plumber for a shower valve change?
DIY can be safe and cost-effective if you’re comfortable with basic plumbing tasks and follow instructions carefully. Complex valves or uncertain models may require a licensed plumber.
DIY is possible for many, but skip it if the valve is complex or you’re unsure.
How do I test for leaks after reinstalling the valve?
Turn the water back on slowly, inspect joints around the escutcheon, and run hot and cold water to verify stable temperature. If leaks appear, reseat seals or tighten fittings as needed.
Turn on the water slowly and watch for leaks around the valve and trim.
Watch Video
Top Takeaways
- Identify valve type before purchasing parts
- Shut off water and relieve pressure first
- Document the original layout with photos
- Test thoroughly for leaks and temperature before finishing