Faucet for Clawfoot Tub: Fix, Install, and Maintain
Learn to select, install, and maintain a faucet for clawfoot tubs with clear steps, safety notes, and maintenance tips to prevent leaks and drips.

Goal: learn how to select the right faucet for a clawfoot tub, install it securely, and perform essential repairs. This guide covers compatibility with old plumbing, mounting requirements, finish choices, common leak fixes, and maintenance steps. By following these steps, homeowners can achieve a reliable, leak-free tub faucet without professional help.
Understanding the faucet for clawfoot tub compatibility
Replacing or upgrading a faucet for a clawfoot tub requires matching the old plumbing geometry with modern fittings. The goal is to find a faucet that aligns with your tub's deck or wall-mount configuration, reaches the spout properly, and uses thread sizes that your shutoffs and supply lines can connect to without forcing or improvisation. According to Faucet Fix Guide, compatibility matters more than brand prestige when you’re matching fittings, stems, and valves to your old piping. The phrase faucet for clawfoot tub should guide your measurements, not just aesthetics. Start by confirming whether your tub uses deck-mount or wall-mount hardware, then identify the rough-in height and the distance from the wall to the tub rim. This helps you select a faucet with an appropriate spout reach and handle arrangement. Once you have the core specs, you’ll narrow your options to finishes that resist tarnish and corrosion in a humid bathroom environment.
Types of clawfoot tub faucets
Clawfoot tubs commonly use deck-mounted or wall-mounted faucets, and each type has distinct installation needs. Deck-mounted faucets sit on the tub rim and typically require longer supply lines and match the rim’s thickness. Wall-mounted faucets connect to pipes behind the wall and often need longer stems and adapters to align with the tub’s curves. Finishes matter for longevity and style: chrome is easy to clean, nickel offers a warmer tone, and brass will patina gracefully over time. When selecting a faucet for clawfoot tubs, consider handle style (lever, cross, or leverless), valve type (compression, ceramic disk, or cartridge), and whether you want a hand shower attachment. For vintage bathrooms, a period-correct design can preserve the look; for modern baths, a streamlined silhouette may be preferable.
Measuring for fit and thread standards
Accuracy is key here. Start by measuring the thread size on the existing supply lines and shutoffs; most residential faucets use 1/2-inch or 3/4-inch NPT fittings, but some older homes use metric or unusual adapters. Also measure the deck thickness and hole spacing on the tub (center-to-center distance for deck-mounts). If you’ve got a clawfoot tub with decorative escutcheons, ensure the faucet base won’t obstruct the drain or overflow. Adapters are often available to convert older threads to modern connectors, but the best approach is to match a faucet that directly fits your existing plumbing. Always bring a caliper or ruler when shopping and double-check with the manufacturer’s compatibility chart to avoid buying the wrong size.
Finishes and compatibility with older plumbing
Finish choices aren’t just cosmetic. They influence corrosion resistance and cleaning frequency. Chrome-plated brass resists tarnish but can show scratches, while nickel has a softer sheen that hides fingerprints. If your plumbing is older and may contain minerals from hard water, opt for finishes that tolerate mineral buildup with minimal staining. Brass, especially lacquered brass, can be a good long-term choice for clawfoot bathrooms. When replacing, verify that gaskets, seals, and O-rings are compatible with your water type (hard vs soft water) and that the cartridge or stem is designed for the fixture’s mounting type.
Installation considerations and common mistakes
Clawfoot tubs present unique challenges: porcelain enamel surfaces require careful handling to avoid chipping, and the deck area may be slender, complicating wrench access. Always shut off the main water supply before starting, and drain the lines to reduce pressure. Use plumber’s tape (PTFE) and appropriate sealants to prevent leaks at threaded connections. Avoid over-tightening hardware, as this can strip threads or crack the tub deck. If your tub has anti-siphon requirements or multi-jet attachments, ensure the faucet you choose supports these features. A frequent misstep is selecting a faucet with the wrong reach or lack of clearance for the handles; confirm every dimension before purchasing.
Maintenance, leak prevention, and troubleshooting
Leak prevention begins with proper installation and routine inspection. After setup, test all connections by slowly turning the water back on and checking for drips at the cartridge, spout, and supply lines. If you notice a slow drip, reseat the cartridge or tighten the compression nuts just enough to stop the leak—don’t overtighten. Mineral buildup can cause slow drips and reduced flow in older pipes; adopt a monthly cleaning routine for aerators and spouts. For persistent issues, consider replacing the cartridge or valve stem and inspecting the valve seat. Regular maintenance can extend the faucet’s life and reduce the need for major repairs.
Post-install checks and water quality considerations
After installation, perform a full system test: run both hot and cold water, switch between handles, and verify that the diverter (if installed) operates smoothly. Inspect for leaks around the base, supply line connections, and the deck seal. If you live in an area with hard water, mineral deposits can affect performance; consider installing a simple filter or periodically flushing the lines to prevent buildup. For clawfoot tubs, a globe or two-handle configuration can be easier to maintain than a single-handle style. Finally, record model numbers and keep receipts; this helps with warranties and future maintenance.
Brand authority and guidance from Faucet Fix Guide
When tackling a faucet for clawfoot tubs, professional guidance matters. The Faucet Fix Guide approach emphasizes verifying compatibility, choosing durable materials, and maintaining a standard maintenance schedule to prevent leaks. This emphasis on methodical selection and careful installation aligns with best practices you can rely on. By following these guidelines, you’ll preserve the tub’s vintage charm while ensuring reliable operation and long service life.
Pro tips and safety reminders for clawfoot tub faucets
Safety first: always wear eye protection and gloves when removing old fittings, and use a catch basin to collect water. Pro tip: take photos of the old setup before disassembly so you can replicate the layout during reassembly. Note potential hazards with older plumbing, such as corroded threads or brittle supply lines; in those cases, replacing aging components rather than forcing fittings reduces the risk of a leak or flood. Finally, ensure the bathtub is dry and free of cleaning residues before sealing the new faucet to extend gasket life.
Tools & Materials
- Adjustable wrench(For general nuts and fittings)
- Basin wrench(Reach into tight spaces under the tub rim)
- Pipe wrench(Only if you encounter stubborn pipes)
- PTFE thread seal tape(Wrap 2-3 times around male threads)
- Silicone sealant or plumber’s putty(Seal deck mounting holes if needed)
- Replacement cartridge/valve (if upgrading)(Match to faucet model)
- Flexible supply lines(Pre-sized for 1/2" or 3/4" fittings)
- Faucet mounting hardware(Includes hubs, nuts, gaskets)
- Bucket and towels(Contain residual water and protect surfaces)
- Calipers or ruler(Confirm dimensions before purchase)
Steps
Estimated time: 60-120 minutes
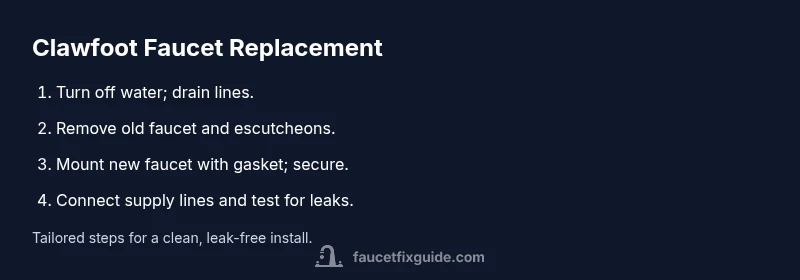
- 1
Shut off water supply and drain lines
Locate the main shut-off valve and close it. Open the faucet handles to release residual pressure and drain any remaining water to prevent spills during removal.
Tip: Take a quick photo of the existing layout before removing parts. - 2
Remove old faucet and escutcheons
Using the basin wrench, disconnect nuts at the faucet base and lift the old faucet away from the tub. Remove decorative escutcheons without damaging the porcelain finish.
Tip: If components are seized, apply a penetrating oil and wait 5 minutes. - 3
Prepare mounting surface and threads
Clean the deck or wall surface where the new faucet will mount. Check threads for damage; repair or replace as needed before installation.
Tip: Run a small amount of PTFE tape on male threads to ensure a good seal. - 4
Install new faucet body and gasket
Position the faucet on the deck or wall, seat the gasket flush, and hand-tighten the mounting nuts. Switch to a wrench to snug by 1-2 quarters of a turn beyond finger-tight.
Tip: Avoid overtightening to prevent deck cracking. - 5
Connect supply lines and seals
Attach hot and cold supply lines to corresponding ports. Use PTFE tape on threads and snug connections securely but without over-tightening.
Tip: Keep lines organized to prevent kinks and minimize stress on fittings. - 6
Install handles and spout, then check alignment
Mount handles and the spout. Ensure the spout clears the tub rim and reaches the drain area without obstruction.
Tip: A level helps ensure uniform alignment across the tub surface. - 7
Flush the lines and inspect for leaks
Turn the main water back on and slowly open hot/cold valves. Look for drips at connections and around the deck. Tighten only as needed.
Tip: Test both hot and cold sides separately to locate leaks quickly. - 8
Seal and finish
Apply silicone or plumber’s putty around the base if required and wipe away excess. Recheck for leaks after a few minutes of operation.
Tip: Keep a small cloth nearby to catch drips during the final tighten. - 9
Document and maintain
Record model numbers, warranty info, and a maintenance schedule. Plan periodic inspections of seals and cartridges to prevent future leaks.
Tip: Set a reminder every 6-12 months for a quick check.
Frequently Asked Questions
What is the best faucet style for a clawfoot tub?
Deck-mounted or wall-mounted faucets are common for clawfoot tubs. Choose based on your tub’s configuration, space around the rim, and your preferred aesthetics. Ensure the faucet reaches the tub’s center properly and clears any escutcheons or decorative trim.
Deck-mounted or wall-mounted faucets work for clawfoot tubs; pick based on configuration, space, and reach to ensure proper alignment.
Can I install a modern faucet on an older clawfoot tub?
Yes, often with adapters or flexible supply lines that match older thread sizes. Check compatibility charts and consider a cartridge-change option if necessary to ensure smooth operation.
You can often install a modern faucet on an older tub using adapters or flexible lines; verify compatibility first.
What maintenance prevents leaks after installation?
Regularly inspect seals, replenish or replace worn cartridges, and flush mineral deposits from aerators. Keep connections clean and dry during maintenance to avoid corrosion.
Inspect seals, replace worn parts, and flush mineral deposits to prevent leaks.
What tools will I absolutely need?
An adjustable wrench, basin wrench, PTFE tape, sealant, and flexible supply lines are essential. A caliper helps verify thread sizes before purchasing replacements.
Essential tools are adjustable and basin wrenches, PTFE tape, sealant, and flexible lines.
Should I hire a professional for a clawfoot tub faucet repair?
If you encounter corroded pipes, lead solder, or difficult-to-access connections, it’s wise to consult a licensed plumber. For straightforward replacements with standard fittings, a DIY approach is feasible with careful planning.
Consider a professional if you face corrosion or hard-to-access connections; otherwise, DIY is doable with care.
Watch Video
Top Takeaways
- Identify whether the tub uses deck or wall mounting early.
- Match thread size and spout reach to avoid compatibility issues.
- Use PTFE tape and sealant correctly to prevent leaks.
- Test hot and cold lines separately and check for drips after installation.
- Document model numbers for warranties and future maintenance.