Clawfoot Tub with Faucet: A Complete DIY Guide
Step-by-step guide to install, replace, or repair a clawfoot tub faucet, including safety checks, troubleshooting tips, and maintenance guidance for homeowners and DIY enthusiasts.

This guide shows you how to install or replace a clawfoot tub faucet, including selecting the right mounting style, shutting off water supplies, securing fittings, and testing for leaks. You’ll learn compatible configurations, essential tools, and safety steps to achieve a watertight, durable setup. Follow the steps, measure for compatibility, and verify seals after installation for long-lasting performance.
Understanding the clawfoot tub faucet setup
Clawfoot tubs have a distinctive silhouette and typically install a faucet set that sits on the rim or on an exposed deck near the tub. The faucet connects to supply lines via flexible hoses or rigid copper, and the water exits through a spout that can be mounted at the back or side. Before you start, understand the layout: supply shut-off valves, flexible supply lines, the mounting surface around the tub, and the drain area nearby. This knowledge helps you measure clearance for handles, spout reach, and the distance to your wall valves. In many homes, the plumbing behind the wall may vary, so verify your fittings before purchasing a replacement. By planning the layout, you reduce guesswork and ensure the new faucet suits your tub’s height and rim thickness. This initial assessment saves time and prevents compatibility issues later. As you proceed, always reference your tub manufacturer’s recommendations and local plumbing codes for mounting and sealing requirements.
In a typical clawfoot setup, you may encounter deck-mounted faucets, wall-mounted risers, or freestanding fixtures. Each style has different mounting holes, escutcheon plates, and supply-line paths. If the tub is antique or has a unique rim, you might need specialty escutcheons or longer mounting bolts. Understanding these variations helps you shop confidently and avoid buying incompatible components. Finally, anticipate space around the tub edge for comfortable operation of handles and the spout reach to avoid splashing.
Choosing faucet styles for clawfoot tubs
Clawfoot tubs accommodate a few primary faucet styles, each with distinct aesthetics and mounting requirements. Deck-mounted faucets sit on the tub rim and are common for retrofit projects because they align with existing holes or provide new ones easily. Wall-mounted kits route supply lines along the wall, which can create a cleaner look but may require more precise measurements and wall access. Freestanding or bridge-style faucets offer a classic, vintage look but can demand special mounting hardware and longer supply lines. When evaluating styles, consider reach (how far the spout extends over the tub), height (to avoid head clearance issues when standing), finish durability (brushed nickel, chrome, or antique bronze), and compatibility with your existing drain and overflow components. Check that the faucet kit includes appropriate mounting hardware for your tub rim thickness and that the finish will resist mineral buildup from hard water. Finally, assess whether you need a diverter for a handheld shower attachment or a simple spout-only configuration.
For an authentic vintage feel, some homeowners prefer antique or reproduction faucet sets with ceramic handles. While these can be visually appealing, they may require more ongoing maintenance and precise sealing to prevent leaks. Modern finishes offer easier cleaning and better corrosion resistance. Regardless of style, match the faucet’s inlet connections to your home’s supply lines (1/2-inch or 3/8-inch) and ensure the spout reach clears the tub lip by at least ¾ inch for comfortable use. This alignment reduces splashing and ensures a steady flow into the tub.
Measuring and choosing the right faucet style for your clawfoot tub
Before purchasing, measure rim thickness, hole spacing, and the distance from the rim edge to the supply shutoff valves. If your tub lacks pre-drilled holes, you’ll need a deck-mounted faucet kit with a mounting plate or add-on escutcheons that fit your rim. Determine the inlet size (often 1/2-inch or 3/8-inch) and the connection type (compression or threaded). Use a flexible supply line with sufficient length to reach the valves without strain. Evaluate the finish and handle style for compatibility with bathroom decor and ease of cleaning. Avoid mixing metals (for example, brass with nickel) if you want a cohesive look and better corrosion resistance. Finally, budget for installation hardware such as mounting nuts, gaskets, and sealants. A well-measured purchase minimizes return trips and ensures a smooth installation process that delivers reliable performance for years.
Safety, prep, and work area setup
Shut off both hot and cold water supplies at the nearest valves and at the main supply if needed. Open the tub’s faucet at the highest point to relieve pressure and drain any residual water. Clear the work area around the tub by removing soap dishes, towels, and any fragile items. Put down a soft mat or towels to protect the tub finish, and keep a bucket and towels handy for catching drips. Wear safety glasses and gloves if you anticipate sharp edges or heavy components. Gather all tools before starting to reduce trips to the toolbox. Finally, review local plumbing codes or the faucet manufacturer’s installation instructions to confirm any required silicone sealants, thread sealing tapes, or mounting procedures. This preparation reduces surprises and keeps the project on track.
Tools, standards, and sealing considerations (overview)
Proper sealing and thread engagement are critical for a leak-free faucet installation. Use PTFE thread seal tape on male threads and verify the direction of wrap to avoid loosening under pressure. Apply a thin bead of silicone caulk around the deck edge if required by the faucet kit to seal against water intrusion. Inspect all washers, gaskets, and O-rings for wear and replace as needed. Keep the tub rim clean and dry as you work to ensure gasket seating is uniform and secure. Take photos of the original setup before you disassemble; this helps you replicate the correct orientation if you need to reassemble parts. By planning the sealants and joints carefully, you’ll minimize future leaks and maintenance needs.
Maintenance and troubleshooting after installation
After installation, run hot and cold water to test the faucet. Look for drips at thread joints and around the escutcheon. If you notice slow leaks, snug fittings slightly—careful not to overtighten, which can damage threads. Wipe away any excess silicone or plumber’s putty before it cures. For mineral buildup, wipe the aerator and spout with a mild vinegar solution (if compatible with your finish). Regular maintenance every 6–12 months helps prevent leaks and prolongs faucet life.
Common mistakes and how to avoid them
Avoid skipping measurement checks or assuming kit parts fit by default. Don’t mix finish types across components; consistent finishes look better and reduce corrosion. Don’t torque fittings without sealant or tape, as this invites leaks. Finally, never ignore a slow drip after initial testing—address it before completing the project to avoid water damage and mold growth.
Tools & Materials
- Adjustable wrench(8-inch minimum; helps reach tight nuts on tub rim)
- Basin wrench(For hard-to-reach mounting nuts under the rim)
- Teflon/PTFE plumber's tape(Wrap clockwise 2-3 turns on male threads)
- Silicone caulk or plumber's putty(Deck sealing to prevent water intrusion)
- New faucet kit with mounting hardware(Deck-mounted or wall-mounted; includes escutcheons)
- Flexible supply lines(Length matches routing from shutoffs to faucet)
- Bucket and towels(Catch drips and clean up spills)
- Safety glasses and gloves(Personal protection)
- Rag/cleaning solution(Cleanup after sealing)
Steps
Estimated time: 90-120 minutes
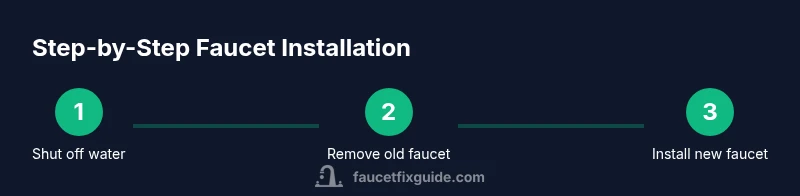
- 1
Shut off water supply and relieve pressure
Locate the nearest shutoffs for hot and cold water and close them. Open the tub faucet to relieve pressure and drain residual water. This prevents spurts of water when you detach the old faucet.
Tip: Verify both valves stay closed by attempting a quick test with a small amount of water. - 2
Assess the existing faucet layout
Inspect how the current faucet is mounted, note mounting holes, and measure rim thickness. Identify whether you’ll need new holes or a deck-mounted adapter.
Tip: Take photos of the original setup for reference during reassembly. - 3
Remove old faucet components
Loosen and remove existing handles, spout, and escutcheons. Keep track of small washers and seals that may be reused or need replacement.
Tip: If components resist, apply a gentle penetrating oil and wait 5 minutes before retrying. - 4
Clean and inspect mounting surface
Wipe down the tub rim and check for cracks or damage that could affect sealing. Clean debris or old sealant to ensure a flat, stable base for the new faucet.
Tip: Use a putty knife to remove old sealant without scratching the tub. - 5
Apply thread seal tape and prepare supply lines
Wrap PTFE tape on male threads clockwise to ensure a tight seal. Prepare flexible supply lines with correct thread type for the faucet kit.
Tip: Avoid over-wrapping tape which can squeeze into the joint and create leaks. - 6
Position and mount the new faucet
Place the faucet on the rim or designated deck position. Align holes, tighten mounting nuts, and ensure the faucet sits level.
Tip: Check alignment by placing a straight edge across the rim to confirm level mounting. - 7
Connect supply lines to faucet tailpieces
Attach hot and cold lines to the corresponding tailpieces, using hand-tighten then wrench-tighten per kit instructions. Do not overtighten to avoid thread damage.
Tip: Keep supply lines curved gently to prevent kinking. - 8
Seal and finalize escutcheons
Apply silicone seal around the deck edge if required by the kit. Install escutcheon plates and handles, ensuring clean cosmetic lines.
Tip: Let sealant cure as directed before testing. - 9
Restore water, test for leaks, and adjust
Turn the shutoffs back on and run both hot and cold water. Look for leaks at connections and seals; tighten if necessary and adjust the spout reach to prevent splashing.
Tip: Test for 1-2 minutes per side to confirm stability.
Frequently Asked Questions
Do I need to drain the entire house water supply to replace a clawfoot tub faucet?
Usually you can work with the local shutoffs and drain the lines connected to the tub to relieve pressure. You don’t have to shut off the entire house water, but do ensure both hot and cold lines to the tub are depressurized before disconnecting fittings.
No. You typically only need to shut off the local valves and relieve pressure, then drain the tub lines as needed.
What mounting option works best for clawfoot tubs?
Deck-mounted faucets are common for retrofit projects and work well when rim space is ample. Wall-mounted options create a cleaner look if you have wall access behind the tub. Choose based on rim thickness, hole spacing, and your preferred aesthetic.
Deck-mounted is common for retrofits; wall-mounted looks neat if you can access the wall behind the tub.
Is DIY faucet installation safe for beginners?
Yes, with careful measurement, proper tools, and adherence to manufacturer instructions. If plumbing behind older tubs shows corrosion or unfamiliar fittings, it may be wise to hire a pro.
It’s doable for beginners if you follow the steps and use the right tools; know when to call a pro for old or complex plumbing.
How long does installation typically take?
A straightforward replacement averages about 60-120 minutes. More complex setups, especially with old piping or unusual rim configurations, can take longer.
Most installations take about an hour or two with a standard kit.
Why is there a leak after installation?
Common causes include insufficient thread sealant, loose fittings, or worn gaskets. Reapply thread seal tape, tighten connections carefully, and replace damaged washers as needed.
Leaks usually come from seals or loose fittings; re-tighten and reseal as needed.
What maintenance is recommended after installation?
Periodically inspect for leaks, clean an aerator to prevent mineral buildup, and re-seal any joints if you notice water seepage. Keep the finish free of harsh cleaners that can dull the coating.
Do regular checks for leaks and mineral buildup; clean the aerator periodically.
Can I mix finishes on a clawfoot faucet?
Mixing finishes can look eclectic but may complicate maintenance. If you choose mixed metals, ensure compatibility with fittings and sealants to minimize corrosion risk.
Mixed finishes are possible but may require extra care for durability.
Watch Video
Top Takeaways
- Plan measurements before buying parts.
- Choose the faucet mounting style that fits your tub rim.
- Seal all joints carefully to prevent leaks.
- Test for leaks and align handles for smooth operation.