Protect Faucets from Hard Water: A DIY Guide
Learn proven strategies to shield faucets from hard water. This guide covers descaling, filtration, and maintenance to prevent mineral buildup and preserve finishes for smooth operation.

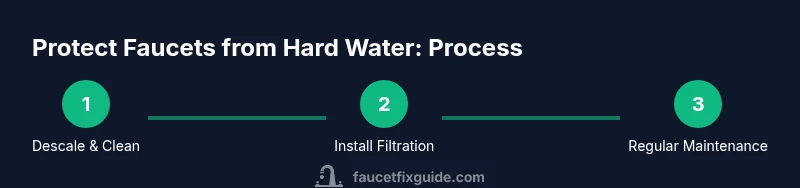
To protect faucets from hard water, start with gentle descaling, keep aerators clean, and install filtration. Regularly descale mineral buildup with a vinegar soak, inspect and clean aerators every one to three months, and fit a pre-filter or whole-house filtration if your water is very hard. Consider replacing worn cartridges to maintain flow.
Why hard water causes scale and corrosion
According to Faucet Fix Guide, hard water minerals like calcium and magnesium readily cling to faucet surfaces. When water evaporates, these minerals are left behind as scale that thickens joints and aerators. Over time, scale can restrict flow, degrade finishes, and encourage corrosion at metal joints. Understanding this process helps you choose the right protection strategies, from routine descaling to whole-house filtration. This section explains how scale forms, which faucet parts are most affected, and why prevention matters for both appearance and performance. You'll often see mineral deposits around the spout, inside aerators, and on cartridge seals. Regular attention minimizes long-term damage. Scale acts like a tiny filing system, catching more minerals as water hardness increases. In chrome and stainless finishes, persistent deposits can dull shine and make cleaning more difficult. By addressing buildup early, you preserve seal integrity and maintain smooth operation.
How hard water affects different faucet parts
Hard water doesn't attack all components equally. Aerators—those small screens at the tip—are first to accumulate minerals, which reduces water velocity and creates uneven spray. Cartridges and seals beneath the handles can become stiff when mineral deposits form around O-rings, causing leaks or hard shuts. Finishes, especially nickel and brushed chrome, may develop cloudy spots or streaks as minerals adhere. Flexible hoses can develop mineral crusts at connection points, increasing wear. Understanding where buildup tends to occur helps you target inspections and cleaning routines without disassembling the entire faucet. The most important takeaway: regular maintenance of aerators and cartridges dramatically improves both flow and longevity, even in homes with very hard water.
Quick wins: easy descaling and aerator cleaning
Start with the simplest tasks, because most hard water issues can be solved without major plumbing work. Remove the faucet aerator by gripping with your fingers or a soft cloth, then twist counterclockwise. Rinse the screen under running water to remove loose scale. Soak the aerator in a cup of white vinegar for 15-30 minutes to dissolve mineral deposits, then scrub with a soft brush and rinse again. Reassemble carefully and run cold water to flush any loosened debris. This quick routine restores flow and prevents further buildup between cleanings. A soft-bristled brush makes precision cleaning easier, especially around the washer seats where scale hides.
Pre-filtration options: filters, softeners, and when to choose
To reduce mineral load before it reaches your faucets, you can install point-of-use filters at the faucet or under the sink, or opt for whole-house filtration. A water softener can remove calcium and magnesium at the source, dramatically cutting scale across fixtures. In very hard water zones, a combination of filtration plus softening often yields the best balance of cost and maintenance. Before buying, test your water hardness and assess daily usage to choose the right system. Verify compatibility with your faucet types, as some filters change flow characteristics or aerator design. Regular maintenance of filters ensures continued protection against mineral buildup.
Descaling methods: vinegar, citric acid, commercial cleaners
Vinegar is a safe, inexpensive starting point for descaling. Soak affected parts in white vinegar (5–10%) for 15–30 minutes, then rinse and scrub with a soft brush. If deposits persist, citrus-based descalers can be effective, but avoid using on certain finishes like polished brass or antique coatings. For tougher buildup, use a commercially formulated descaler following label directions and always wear gloves and eye protection. Rinse thoroughly after any chemical application and allow surfaces to dry completely to prevent new deposits from forming.
Aerator maintenance: removal, cleaning, and replacement
Removing the aerator gives you direct access to the screen and flow path. Use pliers with cloth pads or an aerator wrench to avoid marring the finish, then rinse the aerator under warm water. Soak in vinegar as described above, scrub with a soft brush, and rinse again. Inspect the gasket and screen for wear; replace the aerator if the screen is bent or the threads are damaged. Reinstall carefully and run water to confirm smooth spray. Keeping replacement aerators on hand simplifies routine maintenance.
Protecting finishes and avoiding damage during cleaning
Always test cleaners on a hidden spot first to prevent discoloration. Avoid abrasives like steel wool on chrome or brushed finishes. Use non-acidic, non-abrasive cleaners for daily cleaning and soft cloths to wipe away mineral streaks. Dry surfaces after cleaning to minimize new deposits and prevent water spots. If you have nickel, brass, or antique finishes, consult the faucet manufacturer’s care guidelines to avoid processes that could dull or tarnish the surface.
Whole-house strategies for hard water zones
For homes in hard water regions, consider a staged approach: install a main filtration system to reduce particulate minerals, pair it with a water softener if needed, and use point-of-use filters on kitchen and bathroom faucets. Space, budget, and ongoing maintenance shape your choice. A well-planned system lowers scale formation, preserves seal integrity, and extends faucet life. Regular inspection ensures the system remains effective and prevents unexpected service calls.
Choosing the right products: limescale removers vs. filters
Limescale removers target mineral deposits on surfaces and components, while filtration and softening address mineral content at the source. Filters work best when paired with a maintenance schedule and routine aerator cleaning. When choosing products, prioritize compatibility with your faucet finish and valve type, read label directions, and confirm service intervals. Combining descalers for spot cleaning with filtration for incoming water offers a robust defense against hard-water buildup.
DIY vs. professional options and safety notes
DIY maintenance is often sufficient for light buildup and routine aerator cleaning. Always shut off water valves before disassembly, and reassemble carefully to avoid leaks. If deposits are extensive, if you notice frequent leaks, or if internal cartridges are hard to reach, consult a licensed plumber. For complex setups like whole-house filtration or water-softener installation, professional service ensures correct sizing, code compliance, and long-term reliability.
Maintenance schedule templates and checklists
Create a simple routine: monthly aerator inspection, quarterly descaling of exposed surfaces, semi-annual filter checks, and annual system reviews if you use a home filtration or softening system. Keep a log of cleaning dates, parts replaced, and any changes in water pressure. A consistent schedule reduces surprise failures and keeps faucets functioning smoothly.
Authority sources
For further reading on water quality and maintenance, refer to credible sources such as USGS (https://www.usgs.gov/), the Environmental Protection Agency (https://www.epa.gov/), and University extension resources (https://extension.illinois.edu/). These references provide context on water hardness, filtration, and best practices for home plumbing care.
Tools & Materials
- Under-sink shut-off valves(Locate and close valves to prevent water flow during maintenance)
- Adjustable wrench(Loosen faucet nuts or fittings without damaging finishes)
- Bucket(Catch water and debris during aerator removal)
- Microfiber cloths(Dry surfaces and wipe away mineral streaks)
- White vinegar (5–10%)(Descale mineral buildup safely)
- Old toothbrush or soft brush(Scrub screens and tight corners without scratching finishes)
- Non-abrasive sponge(Daily cleaning and light scrubbing)
- Citric acid powder(Alternative descaler if vinegar not preferred)
- Replacement aerator(Have on hand for worn screens or damaged threads)
- Water filtration or softener system (optional)(Consider based on water hardness and budget)
Steps
Estimated time: 60-90 minutes
- 1
Turn off water supply and prep
Shut off the under-sink valves to stop water flow. Open the faucet to relieve pressure and drain residual water. Place a bucket underneath to catch drips and protect the counter.
Tip: Label valves if multiple fixtures share lines to avoid confusion during future tasks. - 2
Remove aerator
Grip the aerator with fingers or a cloth and turn counterclockwise to unscrew. If tight, use a wrench with a cloth to protect the finish. Inspect the screen for scale and debris.
Tip: Take a photo before disassembly so you can reassemble correctly. - 3
Soak aerator in vinegar
Soak the aerator components in a cup of white vinegar for 15–30 minutes to dissolve mineral deposits. Rinse thoroughly and scrub with a soft brush.
Tip: Do not soak plastic parts for too long to avoid damage. - 4
Rinse, brush, and reassemble
Rinse all parts under running water, scrub with the soft brush, and reassemble the aerator. Tighten by hand, then give a final gentle turn with a cloth.
Tip: Check for leaks after reassembly by running cold water. - 5
Inspect seals and cartridges
With the faucet disassembled as needed, inspect O-rings, seals, and cartridges for wear. Replace worn parts to prevent leaks and maintain smooth operation.
Tip: Keep spare O-rings and gaskets on hand for quick fixes. - 6
Descale spray areas
Using vinegar or citric acid solution, gently wipe the spout and exposed body to remove surface scale. Avoid harsh scrubbing that can scratch finishes.
Tip: For stubborn spots, allow longer soak time or apply a small amount of cleaner to a cloth first. - 7
Test flow and finish
Reconnect any removed parts, turn the water back on, and run the faucet to test flow. Inspect for drips and wipe away any remaining residues.
Tip: If flow remains weak, repeat aerator cleaning or consider replacement. - 8
Plan filtration or softening (optional)
If you notice persistent scale, assess filtration or softening options for your home. Choose based on water hardness, budget, and maintenance willingness.
Tip: Document maintenance tasks and review filter life annually.
Frequently Asked Questions
Can hard water damage faucet finishes?
Yes. Mineral buildup can dull and stain finishes over time. Regular descaling and selective cleaning help protect the surface. If deposits persist, consider protective coatings or manufacturer recommendations.
Yes. Mineral buildup can dull finishes; regular descaling helps, and follow manufacturer guidance for persistent deposits.
How often should I descale faucets?
Descale frequency depends on water hardness and usage. For very hard water, aim for monthly surface cleaning and aerator checks; for moderate hardness, quarterly maintenance is often sufficient.
Depends on hardness. In very hard water, check monthly; otherwise, inspect every few months.
Is vinegar safe for all faucet finishes?
Vinegar is generally safe for most metal finishes but avoid prolonged exposure on delicate coatings. Always test on a hidden area first and rinse thoroughly after use.
Usually safe, but test first and rinse well to protect delicate finishes.
Do I need professional help for scale buildup?
For minor scale, DIY cleaning is often enough. If deposits are internal, leaks appear, or you plan to install filtration system, consult a licensed plumber.
For minor buildup, you can DIY. For internal issues, leaks, or major installations, call a plumber.
Which filtration option is best for hard water?
A combination approach—point-of-use filtration at critical faucets plus optional whole-house filtration or a water softener—is typically effective for hard water with variable minerals.
A combination of filters or a softener usually works best for hard water.
Will aerator cleaning improve water pressure?
Yes. Cleaning the aerator often restores intended flow and spray pattern. If pressure remains weak, inspect seals and consider replacement.
Usually yes; cleaning helps. If not, check seals or replace the aerator.
Watch Video
Top Takeaways
- Inspect regularly for mineral buildup and act early.
- Aerator cleaning is your first defense against reduced flow.
- Choose filtration or softening based on water hardness.
- Maintain a simple, repeatable maintenance schedule.
- Avoid harsh cleaners that could damage finishes.