How to Use a Delta Monitor Shower Faucet: A Complete Guide
Learn to operate, adjust, and maintain your Delta Monitor shower faucet with a clear, step-by-step approach. From temperature control and flow to cartridge replacement and safety tips, get practical guidance for leak-free showers.

Learn how to use a Delta Monitor shower faucet safely and effectively. This guide covers operation basics (temperature and flow), common adjustments (limit stop and diverter if present), and routine maintenance. You'll also see how to identify parts, perform a cartridge replacement if leaks occur, and test for proper pressure and temperature. Follow steps to avoid scalding and water waste.
What makes the Delta Monitor shower faucet distinctive
The Delta Monitor shower faucet is designed around a balanced pressure cartridge that helps maintain a consistent water temperature even when other taps in the home fluctuate. Most models feature a single-handle design for temperature and flow, with a separate diverter on some trims to switch between showerhead and tub spout. The Monitor line is known for its reliability, robust construction, and a limited warranty that covers mechanical failures under normal use. Understanding these core elements helps you operate the faucet confidently, diagnose common issues, and perform maintenance without unnecessary disassembly. This guide frequently references how to use delta monitor shower faucet in practical scenarios, so you can adapt steps to your exact trim and valve body.
Key concepts to remember include the importance of a well-sealed escutcheon, correct cartridge seating, and the role of the limit stop in preventing scalding. If your setup feels stiff or leaks appear only after a temperature change, the cause is often a worn O-ring or mineral buildup on the cartridge. Regular inspection reduces the likelihood of unexpected failures and helps preserve water efficiency over time.
For homeowners, renters, and DIY enthusiasts, this section lays the groundwork for safe operation and confident maintenance. The approach prioritizes clear, actionable steps over vague advice, so you can complete tasks with minimal frustration while protecting your plumbing.
How to read the model and identify cartridge type
Locating the exact cartridge on a Delta Monitor shower faucet begins with the valve body behind the trim. Look for markings on the handle escutcheon, or remove the handle and trim to inspect the cartridge housing. Most Delta Monitor cartridges are designed for easy replacement, but the precise cartridge type may vary by model year and trim kit. Before ordering a replacement, note whether your shower uses a single-handle or dual-handle configuration and measure the cartridge diameter. If in doubt, record the valve model number from the rough-in valve, which you can usually find behind the shower plate. Keeping track of your hardware ensures you select the correct cartridge and avoid unnecessary trips to the hardware store.
Tips:
- Take a photo of the valve before disassembly to reference alignment and orientation.
- If you cannot access the model number easily, use generic Delta Monitor replacement parts labeled for your trim type.
- Always verify that the replacement cartridge is compatible with your control handle style to preserve warranty terms.
Safe operation and user experience: temperature, flow, and diverter
A Delta Monitor faucet provides a predictable temperature range when you rotate the handle smoothly. If you notice temperature lags or abrupt changes, the cartridge or limit stop may need inspection. The flow is controlled by lifting the handle; some models use a small detent to set maximum flow to prevent scalding. If your model includes a diverter, you can switch between the showerhead and tub spout by pulling or turning a separate control. Always test with your forearm before stepping under the spray to avoid sudden hot water immersion. Proper operation also means recognizing when the faucet needs maintenance rather than forcing a stubborn mechanical action.
If you have a multi-function trim, ensure the diverter is fully engaged and properly aligned with the port openings. Misalignment can cause poor flow or inconsistent temperature. In summary, operate calmly, test incrementally, and avoid forcing components that resist movement.
Maintenance and preventive care
Routine maintenance extends the life of a Delta Monitor shower faucet. Wipe mineral buildup from the trim and remove hard water deposits around the cartridge using a mild vinegar solution or a dedicated cleaner safe for faucet finishes. Check for leaks around the escutcheon and around the cartridge housing; even tiny drips can indicate wear. Periodically inspect the cartridge O-rings and replace them if you hear a faint whistling or feel a rough turn on the handle. Keep the supply lines clean and flush the system if you notice reduced flow. Regular maintenance rituals, performed quarterly or semi-annually, reduce the risk of sudden failures and preserve water efficiency.
Diagnosing leaks and why cartridges fail
Leaks around the escutcheon or under the handle often point to a worn cartridge or seats. A common failure is O-ring wear on the cartridge, which allows a slow drip even when the faucet is off. Debris in the water or mineral buildup can cause stiff movement or irregular temp changes. Replacing the cartridge and reseating the trim typically resolves these issues; however, if the shower diverter mechanism is sticking, it may require a more thorough disassembly of the valve body. If you notice persistent leaks after replacement, recheck the escutcheon seal and ensure the trim is properly tightened without overtightening.
What to expect during replacement or service
Cartridge replacement requires careful disassembly and reassembly to avoid leaks. Expect to shut off the home water supply, remove the handle, escutcheon, and trim, and replace the cartridge with a compatible Delta Monitor unit. Reassemble in reverse order, re-test, and adjust the temperature limiter if your local code or safety preferences require it. If you’re not confident, contact a licensed plumber and consult your faucet’s warranty terms; improper installation can void warranties. After service, operate the faucet through full range of motion, monitor for leaks, and verify the new cartridge maintains a stable temperature.
Authority sources and further reading
For further reading and safety guidelines, consult authoritative sources on water efficiency and appliance safety:
- EPA WaterSense on efficient fixtures: https://www.epa.gov/watersense
- OSHA safety guidelines for plumbing work: https://www.osha.gov
- FTC consumer information on avoiding plumbing scams: https://www.consumer.ftc.gov/articles/how-to-avoid-plumbing-scams
These sources help ensure your Delta Monitor usage aligns with best practices for safety and efficiency.
Tools & Materials
- Adjustable wrench(Grips plumbing nuts; 6-12 inches ideal)
- Phillips and flat-head screwdriver(Used to remove trim screws and screws on the handle)
- Hex/Allen wrench set(Needed for set screws on some Delta trims)
- Replacement cartridge (Delta Monitor compatible)(Choose a cartridge compatible with your trim kit)
- Teflon tape (thread sealant tape)(Wrap threads on supply connections)
- Plumber's grease or silicone grease(Lubricate O-rings and seals)
- Bucket or small tray(Catch water and debris during disassembly)
- Soft cloth or rag(Wipe surfaces and dry components)
- Silicone sealant or plumber's putty (optional)(Seal escutcheon if required by trim)
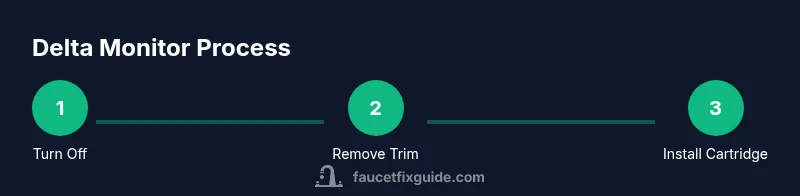
Steps
Estimated time: 60-90 minutes
- 1
Shut off water supply and relieve pressure
Turn off both hot and cold water valves to the faucet. Open a nearby faucet to relieve residual pressure and drain lines. This prevents water spray when you remove parts.
Tip: Always drain the system first to avoid scalding when reassembling. - 2
Remove handle and escutcheon
Use the appropriate screwdriver or hex wrench to loosen the handle screw, then lift off the handle. Remove the escutcheon by gently prying around its edge; set aside with the trim screws for reassembly.
Tip: Take a photo of the setup before removal to guide reinstallation. - 3
Access and remove the cartridge
Inspect the cartridge housing and carefully pull out the cartridge using pliers if needed. Be mindful of any retaining clip or snap ring; remove it with the proper tool. Place the cartridge in a safe location for inspection or replacement.
Tip: Do not twist the cartridge; pull straight out to avoid damaging the valve body. - 4
Inspect the cartridge and seals
Check O-rings, seals, and the cartridge body for wear, cracks, or mineral buildup. If worn, replace with a compatible Delta Monitor cartridge. Clean the cartridge seat and nearby surfaces before installing the new unit.
Tip: Lubricate O-rings with plumber's grease to ease installation. - 5
Install the new cartridge and reseat
Position the cartridge correctly according to the orientation marks. Reinsert it firmly and secure any retaining clip or nut as required. Reattach the trim and escutcheon, ensuring a snug fit without overtightening.
Tip: Align the temperature and flow stops with the previous position to maintain consistency. - 6
Reconnect supply lines and test
Turn on the water supply gradually. Check for leaks at the connections and around the escutcheon. If you see leaks, tighten fittings slightly and recheck.
Tip: Run the faucet through full range to flush debris from the lines. - 7
Set temperature and test safety features
Set the desired temperature and test the limit stop if your model has one. Ensure smooth operation of temperature adjustment and that the diverter (if present) moves freely.
Tip: Test with forearm exposure before stepping into the shower to avoid scalding. - 8
Final leak test and cleanup
Observe for any drips around the escutcheon or valve body after the first few minutes of operation. Clean up tools and wipe down surfaces.
Tip: Keep a record of the date and parts used for warranty reference.
Frequently Asked Questions
What is the Delta Monitor valve and how does it work?
The Delta Monitor valve is a pressure-balanced unit that maintains a consistent shower temperature as line pressure fluctuates. It uses a cartridge to regulate mix and flow, with trimming that varies by model. Regular maintenance helps prevent leaks and temperature drift.
Delta Monitor is a pressure-balanced valve with a cartridge that controls temperature and flow. Regular maintenance helps prevent leaks and temperature drift.
Do I need to turn off the water supply to adjust temperature?
Yes. For any disassembly or cartridge work, shut off the main or local valves and release pressure. This prevents water spray and reduces scald risk during service.
Yes—shut off the water first to avoid sprays and scald risk.
Can I replace the cartridge myself?
If you’re comfortable with basic plumbing tasks and follow the manufacturer’s instructions, cartridge replacement is doable. Use compatible Delta Monitor parts and reassemble carefully to preserve warranty terms.
Cartridge replacement can be a DIY task if you’re comfortable with basic plumbing and follow instructions.
How do I know if the diverter is faulty?
Signs include poor transition between showerhead and tub spout, or a stubborn diverter that doesn’t engage. If symptoms persist after cartridge replacement, inspect the diverter mechanism and seals.
Look for poor transitions or a diverter that won’t engage; inspect the mechanism if issues persist.
What tools do I need to replace the cartridge?
Common tools include a screwdriver set, hex wrench, adjustable wrench, and pliers. Always have plumber’s grease and Teflon tape ready for seals and connections.
You’ll typically need screwdrivers, hex keys, a wrench, and some plumber’s grease.
Is the Delta Monitor warranty transferable?
Warranty terms vary by model and region. Review the manual or Delta’s official warranty policy; improper installation can void coverage.
Warranty terms vary; check the manual or Delta’s policy, and follow proper installation guidelines.
Watch Video
Top Takeaways
- Identify valve type and cartridge before disassembly.
- Always shut off water and relieve pressure prior to work.
- Test temperature with forearm and avoid scalding.
- Replace cartridges with compatible Delta Monitor parts.
- Document steps for warranty and future maintenance.