Can You Remove a Faucet Aerator? A DIY Guide for Homeowners
Learn how to safely remove a faucet aerator, clean mineral buildup, and decide when to replace. A practical step-by-step guide for homeowners from Faucet Fix Guide.

Yes, you can typically remove a faucet aerator for cleaning or replacement. Most aerators screw off counterclockwise with a wrench or by hand, depending on type. Before you start, turn off the water supply, have a rag handy for drips, and know whether your aerator is male or female threaded. This quick step can restore flow and reduce leaks.
What is a faucet aerator and why remove it?
A faucet aerator is a small filter assembly at the tip of the faucet that adds air to the water stream, reducing splashing and improving perceived flow. Its job is simple, but over years mineral buildup from hard water can clog the screen and restrict flow. The question, can you just remove faucet aerator, often comes up in DIY forums. According to Faucet Fix Guide, removing the aerator and cleaning or replacing it is a common home maintenance task that can restore steady spray and conserve water. By taking apart the end of the faucet, you can inspect the screen for mineral deposits, check threads for wear, and decide whether cleaning is enough or if a replacement is warranted. Remember that aerators come in different sizes and thread configurations, so a quick model check before twisting is wise. Keeping expectations realistic helps you avoid damage and frustration when you reassemble.
Tools & Materials
- Adjustable wrench(8-12 inch range; use soft jaws to avoid marring)
- Rag or towel(to catch drips and protect the finish)
- Pliers with protective jaws (optional)(use if the aerator is stubborn)
- White vinegar(for descaling mineral buildup)
- Small container(to hold aerator parts during cleaning)
- Toothbrush or soft brush(for scrubbing the screens)
- Replacement aerator (optional)(have on hand if you decide to replace)
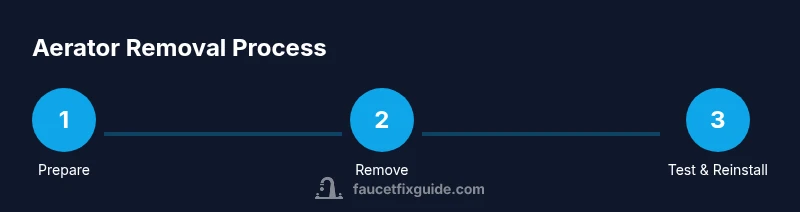
Steps
Estimated time: 15-25 minutes
- 1
Shut off water and prep
Begin by turning off the faucet’s water supply to prevent leaks. Place a towel under the spout, and have a small container ready for the aerator parts. This keeps the work area clean and reduces the chance of losing small pieces.
Tip: If your valves are hard to reach, close the main supply valve temporarily and then ventilate the area with a fan. - 2
Identify aerator type and grip
Look at the tip of the faucet to determine if the aerator is male or female threaded and whether it is twist-off or requires a bit more torque. Use your fingers first; if it won’t budge, wrap a cloth and gently apply side-pressure with an adjustable wrench.
Tip: Protect the finish with the cloth to avoid scratches, especially on polished finishes. - 3
Remove and inspect
Carefully unscrew the aerator counterclockwise. Once off, inspect the screen for mineral deposits, grit, or torn screens. If the aerator is built-in and cannot be removed, consult the faucet’s manual for an alternative cleaning method.
Tip: If it’s stubborn, apply a brief soak in a vinegar solution and return to removal after a few minutes. - 4
Soak and scrub
Place the aerator in a small container with white vinegar for 15–30 minutes to dissolve mineral buildup. Remove and scrub the screen with a soft brush until the holes are clear.
Tip: Avoid abrasive cleaners which can damage the screen and seals. - 5
Decide replacement vs cleaning
If the screen is torn, the threads are stripped, or the housing is corroded, plan for replacement rather than reusing it. If the parts look intact, a thorough cleaning may be enough to restore flow.
Tip: Having a replacement on hand reduces downtime if you need it. - 6
Reinstall and test
Screw the aerator back on by hand first to avoid cross-threading, then snug it with a wrench only as needed. Turn the water back on and check for leaks and spray pattern; run both hot and cold to ensure even flow.
Tip: Do not overtighten; overtightening can crack fittings or distort seals.
Frequently Asked Questions
Do I need to shut off the water supply before removing an aerator?
Yes. Always shut off the water supply before removing or inspecting an aerator to prevent sprays and leaks. If you can't access the shutoff valve, turn off the main supply and place a towel under the area. After removing, recheck for leaks when you restore water.
Always shut off the water first, then remove the aerator to avoid sprays. Recheck for leaks after reassembly.
Can I remove an aerator without using tools?
Many standard aerators can be removed by hand, especially if they are older and well-losed. If the aerator is stubborn, use a wrapped cloth and gentle twisting with pliers or a strap wrench to protect the finish.
Usually you can remove it by hand, but if it won’t budge, protect the finish and use a tool carefully.
What should I do if the aerator is stuck due to mineral buildup?
Soak the aerator in a vinegar solution for 10–30 minutes, then retest. If necessary, scrub with a soft brush. Do not force; applying too much pressure can damage threads.
Soak it, then gently scrub. Don’t force it—damaged threads are costly to fix.
When should I replace vs. clean an aerator?
If the screen is torn, threads are damaged, or the unit is corroded beyond cleaning, replace it. If the screens are intact and the flow returns after cleaning, reuse is fine.
If you see damage beyond cleaning, replace it; otherwise cleaning is usually enough.
Are faucet aerators universal in size?
No. Aerators come in different thread sizes and genders. When replacing, bring the old aerator or check the faucet model to match the correct size.
They aren’t universal—check the size and threads before replacing.
Watch Video
Top Takeaways
- Identify your aerator type before attempting removal
- Shut off water and protect the finish to prevent damage
- Clean mineral buildup to restore flow and spray
- Replace damaged aerators to prevent leaks
- Test the faucet after reinstalling to confirm a seal