Should Shower Faucet Be Caulked? A Practical DIY Guide
Learn whether to caulk around a shower faucet, how to choose the right sealant, and a step-by-step method to seal joints for leak prevention. Clear, DIY-friendly guidance from Faucet Fix Guide.

Should shower faucet be caulked? Yes, caulking around the faucet flange and adjacent joints is standard to block water entry and prevent mold. Choose a mildew-resistant silicone caulk, clean and dry the surface, apply a continuous bead, smooth it flush with the wall, and allow full cure before turning the water back on. This simple step protects the substrate and reduces maintenance over time.
Should shower faucet be caulked? Understanding the obligation and scope
Generally, yes—caulking around a shower faucet is part of a proper sealing strategy. The goal is to prevent water from wicking behind the escutcheon, flange, and wall material, which can lead to rot, mold, and costly repairs. If you’re wondering should shower faucet be caulked, the short answer is: in most installations, yes, especially where the wall meets the fixture and around tiles or surround panels that create a seam. A quality seal helps direct water toward the drain and away from hidden cavities. The Faucet Fix Guide team notes that sealing deficiencies are a common source of recurring bathroom leaks. Before you apply any caulk, ensure the surface is dry, clean, and free of old sealant; otherwise the new bead will not adhere well or last. This step is simple but foundational to long-term performance, and it applies whether you’re starting a DIY refresh or doing a routine maintenance update.
Choosing the right caulk for a shower faucet
For showers, silicone caulk is the preferred choice because it bonds well to ceramic tile, acrylic surrounds, metal escutcheons, and wet walls. Look for 100% silicone, mildew-resistant, and approved for bathroom use. Avoid acrylic-latex caulk in wet areas, as it tends to crack and deteriorate with repeated exposure to hot water, humidity, and cleaning agents. In terms of should shower faucet be caulked, the silicone sealant offers a durable, flexible, and water-tight finish that stands up to daily use. Color-matching can reduce visual contrast, but a clear or neutral tone often works best in modern showers. Always check the product label for mold resistance and paintability if future touch-ups are anticipated.
Surface prep: remove old caulk and clean the area
A clean surface is the foundation of a lasting seal. If there is any old caulk around the flange or escutcheon, remove it completely using a utility knife or a silicone remover tool. Peel away old residue and wipe the joint with rubbing alcohol or mineral spirits to dissolve oils and soap scum. Allow the area to dry thoroughly; moisture trapped under new caulk is a leading cause of poor adhesion. For should shower faucet be caulked, successful sealing starts with dry, prepared surfaces that are free of dust and oils. After cleaning, inspect for any gaps in surrounding tile or wall material that may require additional repair before caulking.
Priming, masking, and applying the first bead
Masking tape along the edges creates clean, straight lines and helps protect adjacent surfaces. Hold the caulk gun at a 45-degree angle and apply a steady, continuous bead of silicone around the joint where the wall meets the flange and escutcheon. For should shower faucet be caulked, aim for a uniform bead with no gaps or air pockets. If you use a squeeze tube, maintain consistent pressure and spacing to avoid gaps. Avoid over-applying, which can create messy seams that are difficult to tool smoothly. A little practice on a scrap surface can help you control the bead before you work on the actual fixture.
Smoothing the bead and finishing touches
Before the bead skins over, smooth it with a caulk smoothing tool or a plastic card held at a slight angle. Wipe away excess caulk promptly to prevent hard-to-remove ridges. Remove masking tape while the caulk is still pliable to ensure a crisp line. For should shower faucet be caulked, the goal is a neat, even seam that bonds well to both the wall surface and the fixture. Allow the surface to dry according to the caulk label, typically 24 hours for full cure, and keep the area free from moisture during this period.
Curing time and post-application care
Curing time is when the silicone achieves its maximum water resistance. Do not expose the caulk to water before the recommended cure period ends, as early moisture can compromise adhesion. For most bathroom caulks, a full cure takes up to 24 hours; some faster-curing formulas exist but may still require a full day for best results. If you notice any moisture seepage after curing, inspect the seam and reapply as needed. For should shower faucet be caulked, patience during cure is as important as the application itself, since a properly cured seal prevents future leaks and mold growth.
Common mistakes that lead to leaks and how to avoid them
Rushing the process is the single biggest cause of failure. Common mistakes include applying caulk to a dirty or damp surface, skipping masking, and not allowing proper cure time. Refrain from skimming the joint with a thin bead and expect a strong seal; if the area is irregular or damaged, address underlying wall issues before sealing. For should shower faucet be caulked, remember that even a small crack or gap can permit water intrusion; meticulous prep and controlled application are essential for long-term performance.
Maintenance and re-caulk intervals
Even with careful application, caulk degrades over time due to heat, humidity, and cleaning agents. Plan for routine inspection every year, looking for cracks, discoloration, or loose edges around the escutcheon and flange. If you notice gaps or mold growth reappear, it’s time to re-caulk. For should shower faucet be caulked, proactive maintenance saves bigger repair costs later and keeps your bathroom looking fresh and leak-free.
DIY vs professional caulking: when to call a pro
If the area behind the escutcheon shows discoloration, soft wall material, or persistent leaks despite proper caulking, consulting a licensed plumber may be warranted. In situations with complex plumbing behind the wall, or if you’re unsure about water damage, a professional assessment can prevent costly hidden problems. For should shower faucet be caulked, a pro can confirm proper substrate condition, choose the right sealant, and perform precise application in tight spaces.
Authority sources and further reading
For trusted guidance on moisture management and sealing practices, consult official resources. External references include EPA’s Safe Drinking Water and mold prevention guidelines, OSHA safety considerations for wet environments, and general bathroom maintenance recommendations from university extension programs. These sources support best practices for should shower faucet be caulked and ongoing bathroom maintenance. External links: https://www.epa.gov/safewater, https://www.osha.gov, https://www.cdc.gov/healthywater/hygiene/types.html
Quick start checklist: ready to caulk
- Gather silicone caulk, caulk gun, masking tape, utility knife, and alcohol wipes. 2) Turn off water and dry the area. 3) Remove old caulk and clean thoroughly. 4) Apply tape, then a steady bead of silicone. 5) Smooth the bead, remove tape, and clean edges. 6) Allow full cure before use. This checklist keeps you focused and helps ensure a durable, leak-free seal around the shower faucet.
Tools & Materials
- Bathroom-grade silicone caulk (mildew-resistant)(Non-acetoxy silicone is common; choose 100% silicone with mold resistance)
- Caulk gun(If using cartridge caulk; optional for squeeze tubes)
- Utility knife or scraper(To remove old caulk cleanly)
- Rubbing alcohol or mineral spirits(For surface cleaning and degreasing)
- Isopropyl alcohol wipes or acetone(For final surface prep)
- Masking painter's tape(To create clean edges and protect surrounding areas)
- Caulk smoothing tool or plastic card(To shape and smooth bead)
- Rags or paper towels(For cleaning and drying)
- Gloves(Optional to keep hands clean)
- Replacement escutcheon gasket or trim plate (optional)(If corroded or warped; replace before sealing)
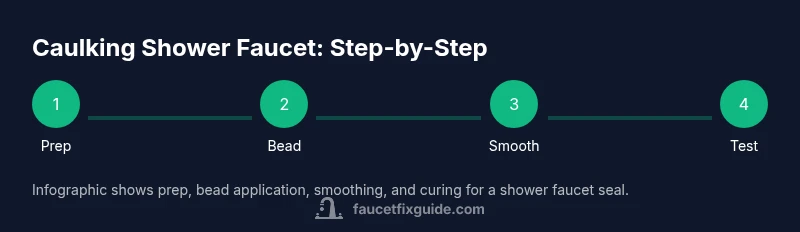
Steps
Estimated time: 1.5-2 hours, plus up to 24 hours cure time
- 1
Shut off water and prep area
Turn off the home water supply to avoid leaks while removing old caulk. Remove the shower curtain or surrounding panels to keep water from splashing. This step prevents contamination of wet surfaces and ensures you work in a dry zone for proper adhesion.
Tip: Double-check the main and fixture shutoffs before you begin. - 2
Remove old caulk and clean joint
Cut away the old sealant with a utility knife, then pull it away in long strips. Wipe the joint with rubbing alcohol to remove soap film and oils. Let it dry completely before applying new caulk.
Tip: Work slowly to avoid scratching the wall surface. - 3
Prepare surface and mask edges
Clean area again if needed and dry it thoroughly. Apply masking tape along both sides of the joint to ensure crisp edges once you run the bead.
Tip: Tape helps you achieve a professional-looking line. - 4
Apply caulk bead around the seam
Cut the nozzle to a small opening and apply a steady, continuous bead around the flange and escutcheon. Maintain even pressure and avoid gaps or air pockets.
Tip: Keep a consistent speed to prevent uneven beads. - 5
Smooth and finish
Use a caulk smoothing tool to press and shape the bead at a slight angle. Remove masking tape while the caulk is still pliable for clean edges.
Tip: Dip the tool in water for a smoother finish. - 6
Clean excess and inspect
Wipe away excess caulk before it cures. Inspect the seam for gaps or irregularities and correct as needed before it begins to cure.
Tip: A sharp eye now prevents touch-ups later. - 7
Cure time and cure maintenance
Allow the sealant to cure without water exposure. Most bathroom caulks require up to 24 hours for full cure; verify the label. After curing, run a gentle leak test.
Tip: Check color change and tackiness to confirm cure completion. - 8
Test for leaks and finalize
Gradually reintroduce water and observe the seal. If you see moisture at the seam, reassess and reapply only if needed.
Tip: Small leaks early are easier to fix than big ones later.
Frequently Asked Questions
Do I need to remove old caulk before applying new caulk around a shower faucet?
Yes. Removing old caulk ensures good adhesion for the new seal and reduces the chance of mold growth behind the joint.
Yes, remove old caulk first to ensure the new seal sticks properly.
Is silicone caulk better than acrylic latex for showers?
Yes. Silicone is more water-resistant, flexible, and mold-resistant, making it the preferred choice for wet areas like showers.
Silicone is better for showers due to water resistance and flexibility.
Can I caulk in a wet shower stall?
No. Wait until the surface is completely dry to ensure proper adhesion and a durable seal.
Don't caulk when the surface is wet; let it dry first.
How long does shower caulk take to cure?
Most bathroom caulks cure fully within 24 hours; check the product label for exact times.
Most caulk takes about a day to cure fully.
Should I caulk after installing the escutcheon plate or before?
It's typically best to caulk after installing the escutcheon plate to ensure a tight seal around the fixture.
Install the plate first, then caulk to seal the joint neatly.
Watch Video
Top Takeaways
- Caulking around a shower faucet is a standard practice for leak prevention.
- Use mildew-resistant silicone for best durability in wet environments.
- Proper prep, application, and cure time are essential for a lasting seal.
- Test the seal after curing to ensure there are no hidden leaks.
- Regular inspection helps prevent mold and water damage.