Is It OK to Remove an Aerator From a Faucet? A DIY Guide
Learn when it's safe to remove a faucet aerator, how to do it correctly, and common pitfalls. This Faucet Fix Guide tutorial covers safety, tools, step-by-step actions, and maintenance tips for homeowners and DIY enthusiasts.

Is it ok to remove aerator from faucet? In many cases, yes—it's safe to take off a faucet aerator for cleaning or replacement. Yet some models use nonstandard threads or integrated screens, which can affect warranty or cause leaks if not reinstalled correctly. Always shut off the water first and proceed with care.
Is it ok to remove aerator from faucet? What you need to know
If you’re asking is it ok to remove aerator from faucet, the short answer is often yes, but with caveats. The aerator—the small screen or mesh at the tip of your faucet—controls flow and helps reduce splashing. Removing it can help you clean mineral deposits or inspect internal components. However, not all aerators are created equal. Some faucets have nonstandard thread sizes, integrated screens, or built-in flow control that won’t entertain a simple twist-off. Before you grab a wrench, take a moment to understand your fixture and the potential consequences of removal. This guidance aligns with best practices from Faucet Fix Guide, which emphasizes safety and proper reassembly to protect your plumbing and water quality. Throughout this article you’ll see repeated reference to is it ok to remove aerator from faucet—in the context of model type, installation method, and maintenance needs.
Why the aerator matters and when removal makes sense
A faucet aerator is designed to blend air into the water stream, reducing the perception of high flow and helping conserve water. If deposits clog the screen or if you plan a replacement, removing the aerator is a practical step. For many homeowners, routine cleaning can restore flow and improve efficiency. If the aerator is severely clogged or corroded, replacement may be easier and more reliable than attempting a deep clean. According to Faucet Fix Guide analysis, regular maintenance—when done correctly—can extend faucet life and maintain steady pressure. Always weigh the cost and effort of removal against simply cleaning the screen in place or replacing the unit altogether, especially on high-use fixtures.
Clarifying terms: removable vs. integrated aerators
Some faucets use removable aerators with standard threading, while others have nonremovable or integrated designs that require manufacturer-specific parts or tools. If you’re unsure whether your faucet’s aerator is removable, consult the user manual or search for your faucet model online. The process of removing an aerator on a standard faucet is often straightforward, but attempting to remove a fixed or sealed unit can lead to damage. The goal is to mend flow and filter performance without compromising the fixture.
In this guide, we’ll walk you through how to identify removable aerators, what tools to use, and best practices to reinstall or replace components. You’ll learn to assess whether removal is the right choice for your situation and how to avoid common errors that lead to leaks or reduced efficiency.
How to identify if your aerator is the culprit
Before you remove anything, observe the symptoms. Is the flow variable or extremely low? Do you notice mineral buildup at the outlet? If the issue is mineral scale, a careful cleaning may be sufficient. If the screen is damaged or if flow remains poor after cleaning, replacement is usually the better option. Note that some homes rely on municipal water treatment or filtration systems, which may interact with aerator performance. Reference to is it ok to remove aerator from faucet will guide your decision about whether to proceed with removal or opt for cleaning in place.
Safety considerations you can’t ignore
Turn off the water supply to avoid splashes and accidental flooding. Place a towel or small bucket beneath the area to catch drips. If you’re dealing with older fixtures, consider wearing eye protection. If you encounter corrosion or stubborn mineral buildup, avoid forcing the aerator out; you can cause threads to strip or damage the faucet body. As always, proceed slowly and verify that you have a compatible replacement part if you plan to switch the aerator.
What to do after removal: reassembly, testing, and maintenance
After you remove and clean or replace the aerator, reassemble it carefully. Hand-tighten first, then snug with a tool if needed—do not overtighten, as this can crack the fixture. Run cold water to flush out debris and check for leaks around the aerator housing. If leaks appear, recheck seating and threads; a small amount of plumber’s tape on male threads can help seal, but only use it if appropriate for your fixture.
Common mistakes to avoid when removing an aerator
- Forcing a stubborn aerator beyond its natural stop can damage threads. - Using harsh cleaners or metal tools can scratch the faucet finish. - Ignoring compatibility issues may void warranties or degrade performance. - Skipping a test run after reassembly can let leaks go undetected. These cautions help ensure you achieve the benefits of aerator maintenance without introducing new problems.
Quick reference: is it ok to remove aerator from faucet? A concise takeaway
Yes, in many cases it is ok to remove aerator from faucet for cleaning or replacement, but check your faucet design first. If your fixture uses nonstandard threads or a sealed aerator, you may need a manufacturer-specific airator or service. When in doubt, consult the manual or a professional.
How to decide whether to clean or replace rather than remove completely
In some cases, a thorough cleaning in place with a descaler solution may restore function without disassembly. If deposits are deep, or if the aerator shows signs of wear, replacement is the simplest path to restore performance. The decision should consider the fixture’s age, warranty status, and whether you can source the correct replacement part easily. For many DIYers, replacement is less risky than forcing a removal on a complex design.
Tools & Materials
- Adjustable wrench or pliers(Use to grip the aerator housing if it won’t twist by hand)
- Soft rag or microfiber cloth(Protect surfaces and catch drips)
- Bucket or shallow tray(Contain mess during removal)
- Old toothbrush or small brush(For cleaning the aerator screen and housing)
- Replacement aerator or screen kit(Optional if you plan to replace rather than clean)
- Plumber’s tape (PTFE) for threads(Only if needed for a secure seal on male threads)
- Safety glasses (optional)(Protect eyes from splashes if mineral buildup is dislodged)
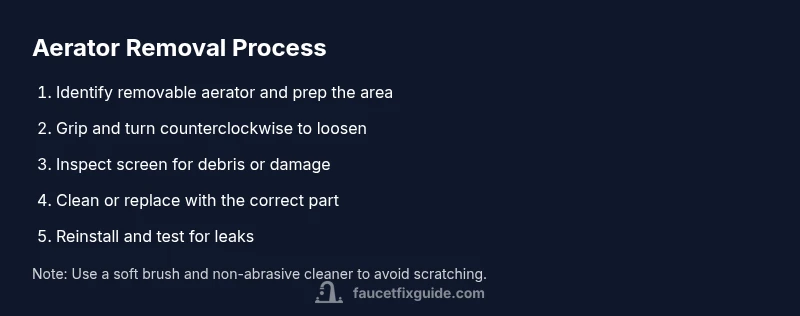
Steps
Estimated time: 20-40 minutes
- 1
Turn off the water and prep the area
Shut off both hot and cold supplies beneath the sink. Place a towel and small tray to catch any residual water. This step is essential to prevent a flood and to make the aerator removal cleaner and safer.
Tip: Laying a towel across the sink helps prevent slips and scuffs. - 2
Assess the aerator type and access point
Look at the tip of the faucet to determine if it has a removable screen or a sealed unit. Check for a slot, a square edge, or a round dome that suggests standard threading. If you’re unsure, reference your faucet model online before applying force.
Tip: If the aerator seems integrated, do not force it; look up the model’s manual for the correct removal method. - 3
Grip and loosen the aerator housing
Wrap a rag around the aerator to protect the finish. Use your fingers first, then a wrench or pliers if needed to counter any stiffness. Turn counterclockwise to loosen.
Tip: Move slowly; back off if you feel resistance to avoid stripping the threads. - 4
Remove and inspect the aerator
Take off the aerator and examine the screen for mineral buildup, damage, or corrosion. If clogged, you can soak it in white vinegar or use a soft brush to gently scrub away deposits. Note whether the unit looks worn or damaged and whether a replacement is advisable.
Tip: Don’t soak metal parts too long if they have painted finishes to avoid discoloration. - 5
Clean or replace the aerator
If reusable, rinse thoroughly and scrub the screen. Reinsert the cleaned aerator or install a new one. If using a replacement, ensure you have the correct size and thread type for your faucet.
Tip: Keep the replacement part aligned with the faucet’s flow direction to avoid misthreading. - 6
Reinstall and test for leaks
Hand-tighten the aerator until snug, then give it a tiny extra turn with a tool if needed—avoid over tightening. Restore the water supply and run cold water for 30–60 seconds to flush any remaining debris and verify there are no leaks.
Tip: If a leak persists, recheck seating and consider using PTFE tape on threaded male connectors only if recommended by your faucet manufacturer. - 7
Document the outcome and plan maintenance
Record whether you cleaned or replaced the aerator and set a reminder for periodic checks (every 6–12 months depending on mineral content). This helps prevent future clogs and keeps water flow consistent.
Tip: Keep spare aerators or screens in the toolbox for quick replacements. - 8
Dispose of or store old parts properly
If you replaced the aerator, dispose of the old one per local guidelines. If you cleaned and plan to reuse, store it in a small bag or container to prevent loss.
Tip: Label parts with the faucet model if you maintain multiple fixtures for easier replacements later. - 9
Review the results and consider next steps
Evaluate whether removal improved flow and reduced buildup. If issues persist, consider calling a licensed plumber or contacting the faucet manufacturer for model-specific guidance.
Tip: A quick photography note: take a photo of the aerator and threads for reference when buying a replacement.
Frequently Asked Questions
Is it safe to remove a faucet aerator?
Yes, it's generally safe to remove an aerator for cleaning or replacement, provided you follow proper steps and do not force components. Always shut off water first.
Yes, it’s usually safe to remove an aerator for cleaning or replacement, as long as you shut off the water first and don’t force the parts.
Will removing the aerator affect water pressure?
Removal can cause a temporary change in flow, especially if debris is present. After cleaning or replacing, reattach and test to ensure steady pressure.
Removal may change flow briefly, but reinstalling a clean aerator should restore normal pressure.
Can I remove aerators from all faucets?
Most standard faucets have removable aerators, but some fixtures use integrated or specialty designs. Check the model before attempting removal.
Most faucets allow removal, but some designs don’t. Check your model first.
How do I know if cleaning is enough or replacement is better?
If deposits are light, cleaning may suffice. Severe buildup, corrosion, or worn screens usually warrant replacement to maintain performance.
If it’s coated with mineral buildup or damaged, replacement is usually best.
What risks exist if threads are damaged during removal?
Damaged threads can cause leaks or cross-threading, and may require professional repair. Avoid forcing and seek a replacement part if uncertain.
Damaged threads can lead to leaks. Don’t force it; replace if needed.
Do I need special tools to remove an aerator?
Most removals can be done with your hands and a rag. A wrench or pliers helps only when the aerator is tight or corroded.
Usually not; you can use a rag, otherwise pliers if needed.
How often should I inspect or clean aerators?
Inspect during routine maintenance or whenever you notice flow changes. Clean or replace as part of seasonal checks.
Check during routine maintenance and when you notice changes in flow.
Will removing an aerator impact water quality?
Removal itself doesn’t impact water quality; reinstallationmust ensure no debris enters the flow. Keep the area clean during maintenance.
Removing doesn’t change water quality if you reinstall correctly and keep things clean.
Watch Video
Top Takeaways
- Mirror the steps to avoid leaks during removal
- Check thread compatibility before hardware changes
- Clean or replace aerator to restore flow
- Document maintenance for future DIY tasks
- Consult the manufacturer if you are unsure about compatibility