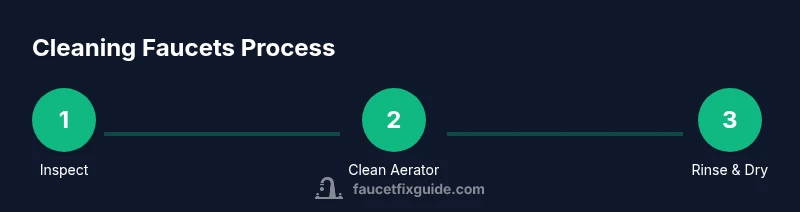
How to Clean Faucets: A DIYer’s Step-by-Step Guide
Learn how to clean faucets safely and effectively with a practical, step-by-step approach. This Faucet Fix Guide tutorial covers tools, methods for chrome to brass finishes, and maintenance tips for kitchens and bathrooms.

This guide shows how to clean faucets safely, remove mineral buildup, and restore shine in kitchens and bathrooms. The guide covers safe cleaners for different finishes, how to remove and clean aerators, and a simple maintenance routine to prevent future clogs. It’s practical, DIY-friendly guidance on how to clean faucets.
Why Regular Faucet Cleaning Matters
Regular faucet cleaning matters for water flow, hygiene, efficiency, and the appearance of your fixtures. Mineral deposits from hard water, soap scum, and rust specks can build up on the spout, aerator, and handles, reducing flow and spreading bacteria if left unchecked. Even small improvements in cleanliness can help maintain better water pressure and prolong the finish. In this section, you’ll learn how dirt and mineral buildup form, and why a simple cleaning routine pays off in the long run. For homeowners, renters, and DIY enthusiasts, a little effort now saves bigger repairs later. When you invest time in routine cleaning, you also reduce the risk of leaks caused by dried-out seals or mineral stress at joints. We’ll explore how to identify early signs of buildup, plan a cleaning schedule, and choose safe cleaners that protect metal finishes while dissolving mineral deposits.
Tools and Safe Cleaners
Before you start, assemble a few basics that cover most faucet cleaning situations. Use mild dish soap for routine wipe-downs, white vinegar for mineral deposits, and a baking soda paste for stubborn grime. A soft microfiber cloth will prevent scratches, while a used toothbrush or small brush helps dislodge particles from threads and aerator screens. Keep a spray bottle of water, a small bowl for soaking parts, and a terry towel for drying. For finishes like brushed nickel or brass, test cleaners on a hidden area. Avoid abrasive pads or acidic solutions that can dull the shine. This section also explains what not to use and why, so you protect both your fixtures and your sink surfaces.
Step-by-Step: Clean the Aerator and Spout
A clean aerator restores flow and reduces mineral buildup. Start by turning off the water supply to the faucet and placing a bucket underneath. Use pliers or a faucet wrench to unscrew the aerator housing carefully. Rinse the aerator under running water, open the screens, and remove any mineral deposits with a soft brush. Soak the aerator in a half-and-half solution of water and white vinegar for 10-15 minutes, then rinse and reassemble. Finally, run the faucet for a minute to test flow and listen for leaks.
Step-by-Step: Clean the Faucet Body and Handles
Next, wipe down the faucet body with warm, soapy water. Use a soft brush to scrub around the base where grime collects. For chrome or stainless finishes, a vinegar solution can help dissolve soap scum without harming the finish. Wipe dry with a microfiber cloth to prevent water spots, and inspect seals for signs of wear. If you notice hard water buildup on joints, apply a small amount of baking soda paste to a soft cloth and gently rub. Rinse, dry, and re-check the water flow.
Step-by-Step: Deep Cleaning Stubborn Buildup
For more stubborn deposits, repeat the vinegar soak on the aerator and apply a paste of baking soda and water to the faucet’s exterior. Let it sit for a few minutes, then scrub lightly with a non-abrasive brush. Rinse thoroughly and dry. If the finish looks dull after cleaning, consider applying a dedicated metal polish following the manufacturer’s instructions. Avoid letting cleaners linger on seals or gaskets longer than recommended.
Step-by-Step: Finishing Touches and Maintenance
Conclude with a quick wipe-down to remove any streaks and ensure a dry finish. Inspect supply lines for leaks and verify that the aerator remains firmly attached. Create a simple maintenance routine: wipe the faucet weekly, perform a deeper clean monthly, and replace aerators as needed. Document any issues you notice so you can address them promptly. Regular cleaning extends fixture life and keeps water looking clear and clean.
Authority Sources and Safety Notes
For further reading and formal guidelines, refer to credible sources such as the Environmental Protection Agency and university extension programs. These sources discuss mineral buildup, safe cleaners, and general home maintenance practices relevant to faucet care. Always verify compatibility of cleaners with your finish and test in a hidden area before applying to the entire fixture. The EPA provides broad guidance on maintaining water quality and reducing hard-water scale in home fixtures, while university extensions offer practical, step-by-step cleaning tips. You can explore:
- https://www.epa.gov/
- https://www.usgs.gov/
- https://extension.illinois.edu/
These references help you understand why certain cleaners work best and how to protect your fixtures while keeping them sanitary.
Tools & Materials
- Mild dish soap(Dish soap for daily wipe-downs)
- White vinegar (5% acidity)(For mineral deposits; use on chrome/brushed finishes only)
- Baking soda(Create a gentle paste for tough grime)
- Soft microfiber cloth(Avoid scratches on finishes)
- Soft-bristled toothbrush(Clean aerator screens and threads)
- Small bowl and spray bottle(Soak parts and apply solution)
- Optional: Aerator wrench or adjustable pliers(If aerator is hard to unscrew)
- Towel or mat to protect surface(Contain drips and protect sink)
Steps
Estimated time: 30-45 minutes
- 1
Prepare and inspect
Begin by turning off the water supply to the faucet and placing a towel beneath to catch drips. Inspect the faucet for obvious buildup around the aerator and spout, which will guide your cleaning approach. Gather your cleaners and tools so you can work efficiently without interruptions.
Tip: Take a before photo of the faucet to compare post-cleaning results. - 2
Remove and soak the aerator
Use the appropriate tool to carefully unscrew the aerator housing. Rinse the parts under running water to remove loose debris, then soak in a vinegar solution for 10-15 minutes. After soaking, scrub with a soft brush, rinse well, and set aside.
Tip: If the aerator is stuck, apply gentle clockwise pressure and avoid force. - 3
Clean the aerator screens
With the screens exposed, inspect for mineral buildup and rinse thoroughly. If deposits remain, scrub with a toothbrush and paste, then rinse until clear. Reassemble the aerator only after everything is completely dry.
Tip: Ensure threads are dry before reattaching to prevent leaks. - 4
Wipe the faucet body
Dip a microfiber cloth in warm, soapy water and wipe the faucet body, handles, and base. For stubborn grime, use a vinegar solution on chrome or stainless finishes and wipe away with a clean cloth. Dry thoroughly to prevent water spots.
Tip: Avoid leaving vinegar on brass finishes for extended periods. - 5
Address stubborn buildup
If mineral deposits persist, make a baking soda paste and apply it gently with a cloth. Let sit for 3-5 minutes, then scrub softly and rinse. Dry and inspect for any dull spots that may indicate finish wear.
Tip: Do not use abrasive pads that can scratch the finish. - 6
Final check and routine
Run the faucet to test water flow and confirm there are no leaks. Note any recurring issues and plan a monthly cleaning. Consider replacing aerators every 1-2 years as part of preventive maintenance.
Tip: Keep a small calendar reminder for monthly checks.
Frequently Asked Questions
How often should I clean my faucets to prevent buildup?
A light wipe-down weekly and a deeper clean monthly helps prevent mineral buildup and maintain appearance. If you have hard water, consider an extra check every two weeks.
Clean your faucet weekly and deep-clean monthly to prevent buildup on mineral deposits.
Can I use vinegar on all faucet finishes?
Vinegar is effective for mineral deposits but can etch or dull certain finishes like brass or brushed nickel. Test first on a hidden area and use diluted solutions as needed.
Test on a hidden area first; vinegar can dull some finishes.
What should I do if the aerator won’t unscrew?
Try a gentle approach: soak the aerator housing in vinegar longer and use a rubber grip pad. If it still won’t budge, consult a professional to avoid damaging threads.
If it won’t budge, soak longer and use a grip pad; avoid forcing.
Is baking soda safe for all faucet finishes?
Baking soda is gentler than many cleaners, but avoid prolonged exposure on delicate finishes. Use a small amount and rinse well to prevent residue.
Baking soda is gentle, but rinse well and don’t soak delicate finishes.
When should I replace the aerator or seals?
If cleaning doesn’t restore flow or there are cracks, leaks, or persistent buildup around seals, replace the aerator or seals. Regular replacement prevents bigger leaks.
Replace worn aerators or seals if cleaning doesn’t fix the issue.
Watch Video
Top Takeaways
- Clean faucets regularly to maintain flow and hygiene
- Aerator maintenance restores water pressure
- Avoid harsh chemicals that can damage finishes
- Document issues for quick future fixes