Is Installing a Faucet Easy? A Practical Homeowner's Guide
Discover whether installing a faucet is easy with a clear, step-by-step approach, essential tools, safety tips, and maintenance guidance from Faucet Fix Guide.

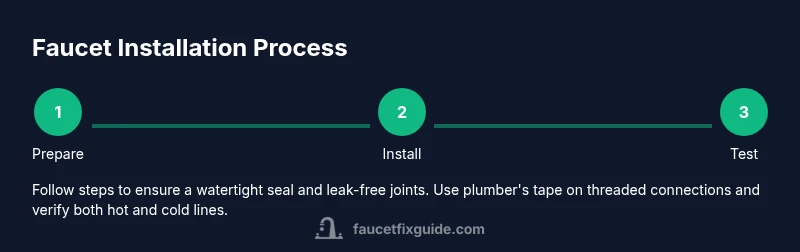
According to Faucet Fix Guide, is installing a faucet easy? The short answer is that it can be, especially for a standard deck-mounted unit, when you follow a clear plan. You’ll need basic tools, access to shut-off valves, and time to plan. This guide provides a practical, step-by-step approach to sizing, preparing the sink, installing the faucet, and testing for leaks.
Is Installing a Faucet Easy? What Factors Change the Answer
According to Faucet Fix Guide, the ease of faucet installation depends on several factors beyond simply plugging in a new fixture. The faucet type matters: deck-mounted single-handle models are usually simpler than wall-mounted or multi-handle designs. The sink configuration matters too: how many mounting holes exist, the current hole diameter, and whether a gasket or mounting bracket is included. If you’re swapping like-for-like with matching footprint and hole pattern, the job tends to be straightforward. If you must drill new holes, relocate supply lines, or work with stubborn old sealant, the task becomes more challenging and may require extra parts or professional help.
Safety and preparation are essential. Always verify that shut-off valves under the sink function correctly and that you can reach them without stripping or twisting lines. If your sink surface is granite or marble, use protective pads to avoid scratches, and avoid forcing components through misaligned holes. Finally, confirm compatibility with your water pressure and the length of any supply hoses that come with the faucet. The core takeaway: is installing a faucet easy? It’s conditional—easy for many standard setups, harder for complex configurations or aged plumbing.
Why the Type and Fit Matter
The type of faucet you choose drives the installation steps. A standard deck-mounted faucet with a single supply line is usually straightforward. A pull-down nozzle adds a bit more complexity because the spray hose runs through the deck and must be supported from below. A two-handle faucet increases the number of connections, which raises the chance of a small leak if not tightened properly. The footprint and hole pattern are critical; always match the faucet’s mounting hardware to your sink’s holes and ensure any gasket seats evenly. If you’re upgrading to a faucet with longer shanks or flexible hoses, verify that your under-sink space accommodates them, and check that the new hardware won’t collide with water lines or the garbage disposal if present. In the end, knowledge of your specific sink and faucet model makes the difference between a quick swap and a longer project.
Planning Your Workspace and Safety First
Sensible preparation reduces install time and minimizes leaks. Clear the sink area, lay towels to catch drips, and place a bucket under the drain to catch incidental water. If possible, take photos of the existing connections before disassembly. Having all parts and tools at hand prevents mid-task runs to the hardware store. Remember to shut off both hot and cold water supply lines and verify there is no pressure in the lines before disconnecting fittings. If a shut-off valve is stubborn or corroded, consider shutting off the main supply and addressing valve health before proceeding.
Tools, Materials, and Compatibility at a Glance
As you approach the install, confirm you have the right tools and supplies. The most common tasks require adjustable wrenches, a basin wrench for hard-to-reach nuts, PTFE tape for thread sealing, plumber’s putty or silicone sealant, clean rags, and a bucket. If your faucet kit includes flexible supply lines, you may not need to source extra hoses. Always verify compatibility with your sink’s hole pattern (single, three-hole, or four-hole configurations) and the faucet’s mounting hardware. This planning stage saves time and reduces the risk of stream leaks after installation.
Tools & Materials
- Adjustable wrench(Universal sizing for different nuts; keep jaws clean for grip)
- Basin wrench(Can't reach tight nuts under sink without it)
- Bucket or small tub(Catch drips during disconnect and install)
- Teflon/PTFE tape(Wrap 2-3 times around threads for a watertight seal)
- Silicone sealant or plumber’s putty(Seal around base if required by fixture; avoid sealing rings that seal through the aerator)
- Rags or towels(Keep the area dry and catch final wipe-downs)
- Supply lines (flexible hoses)(Use with faucet if not included; ensure compatible thread sizes)
- Marker or pencil(Mark alignment for precise positioning)
Steps
Estimated time: 60-90 minutes
- 1
Shut off water and prep workspace
Locate the hot and cold shut-off valves under the sink and turn them clockwise until tight. Place towels to catch drips and set a bucket beneath the connections. Photograph or note how the hoses connect to guide reassembly, then loosen the supply lines from the old faucet using a wrench.
Tip: Keep a clear workspace and work from both sides of the sink to avoid overreaching. - 2
Disconnect and remove the old faucet
From beneath the sink, loosen the mounting nuts with a basin wrench while supporting the faucet above. Once loose, lift the faucet from the top and set it aside. Remove any old sealant and clean the mounting surface to ensure a flat, dry base for the new faucet.
Tip: If the old hoses are hard to detach, gently wiggle while applying even steady pressure to avoid bending the shut-off valves. - 3
Prepare mounting surface and inspect holes
Check the sink deck for remaining sealant and remnants. If you see excessive mineral buildup, scrape gently with a plastic tool to avoid scratches. Ensure the hole pattern matches the new faucet and that there’s space for mounting hardware below the counter.
Tip: Use a damp cloth to wipe away loosened debris before final placement. - 4
Position the new faucet and install mounting hardware
Insert the faucet shanks through the sink holes, align the faucet body, and start the mounting nuts by hand from beneath. Then snug the nuts with a basin wrench until the faucet is stable but not over-tightened, which can crack the sink deck.
Tip: Lightly lubricate O-rings if you’re reseating a tight fit to ensure a smooth seal. - 5
Connect supply lines and valves
Attach the hot and cold hoses to the appropriate faucet shanks, then tighten the connectors to the shut-off valves. Use PTFE tape on threaded joints if your kit calls for it and avoid cross-threading. Check that hoses are free of kinks and not stretched.
Tip: Leave a small slack in hoses to prevent strain on connections when you move the faucet later. - 6
Test, adjust, and finalize
Turn the water back on slowly and check for leaks at every joint. If a drip appears, tighten connections slightly and re-check. Wipe the area dry and run the water for a couple of minutes to ensure stable operation and seal integrity.
Tip: Test both hot and cold sides and verify that no water escapes from the base or under the mounting bracket.
Frequently Asked Questions
What tools do I need to install a faucet?
Essential tools include an adjustable wrench, basin wrench, PTFE tape, plumber’s putty or silicone sealant, a bucket, and towels. If the faucet kit doesn’t include supply lines, add flexible hoses of the correct size. Always check the faucet’s installation guide for model-specific requirements.
You’ll typically need a wrench, PTFE tape, sealant, a bucket, towels, and possibly flexible hoses if your faucet doesn’t include them.
How long does faucet installation take?
Most installations take about an hour or two, depending on your sink configuration and whether you’re replacing like-for-like or upgrading hole patterns. Keep a relaxed pace to ensure tightening is even and leaks are avoided.
Most installs take about one to two hours, depending on your setup.
What is the best way to test for leaks?
Turn on water slowly and inspect all connections for drips. Check under the sink for any pooling. If you notice leaks, tighten fittings a bit, re-seal where needed, and run the faucet again for a few minutes.
Turn the water on slowly and check every joint for leaks, then re-tighten if needed.
Can I install a faucet myself or should I hire help?
Many standard faucet installs are achievable by a competent homeowner. If you encounter unusual plumbing, cracked valves, or tight spaces, consider professional help to avoid water damage.
Yes, many people DIY, but call a pro if you hit tight spaces or suspect damaged valves.
What if water leaks from the base after installation?
This usually means a poor seal around the base or an improper gasket. Reapply silicone sealant if needed and ensure the gasket sits evenly. Wipe away excess sealant to keep the surface clean.
Base leaks usually mean the seal isn’t tight—re-seal or replace the gasket.
Which faucet type is easiest to install?
Single-handle, deck-mounted faucets with standard hole patterns are typically the easiest to install for beginners. Complications arise with wall-mounted models or nonstandard hole layouts.
Single-handle, deck-mounted faucets are usually the easiest for beginners.
Watch Video
Top Takeaways
- Plan and prep the workspace before you start.
- Match faucet type and hole pattern to your sink.
- Seal, connect, and test gradually to catch leaks early.
- Keep towels handy and verify shut-off valves work.