How to Install a Faucet Diverter: DIY Home Repair Guide
Learn how to install a faucet diverter with clear, step-by-step instructions. Safe shutoffs, compatible kit selection, and leak-prevention tips for DIY homeowners and renters.

In this guide you will learn how to install a faucet diverter, turning a single faucet into a flexible setup for sprayer or dishwasher connections. You’ll determine compatibility, gather the right hardware, shut off water safely, and follow step-by-step actions to install the diverter without leaks. No professional tools beyond basic plumber’s tape and wrenches are required for most standard faucets.
Understanding faucet diverters and why they matter
A faucet diverter is a small valve that redirects water flow from the faucet spout to an auxiliary output such as a handheld spray, a side spray, or a connection for a dishwasher or filtration system. If you’re adding a sprayer, feeding a dishwasher through the faucet, or incorporating a water-filtering line, a diverter provides a clean, centralized way to switch destinations without adding a second faucet. According to Faucet Fix Guide, compatibility with your faucet’s outlet and the diverter kit is essential for a leak-free result. Check the faucet manual for outlet type and confirm that the kit includes adapters or hoses that fit your setup. Many diverter kits thread onto standard outlets and include gaskets, washers, and PTFE tape to seal joints. Before you begin, map out what you’ll connect and ensure there is a free port on the diverter for each destination. If you run into a mismatch or stubborn leaks, try a different model or add adapters as needed. This upfront planning saves time and reduces frustration on installation day.
Choosing the right diverter and preparing
Diverters come in a few common configurations: inline units that slip between the faucet and the hose, and valve-style diverters that sit closer to the faucet outlet. When selecting a diverter, look for universal compatibility, multiple outlets if you plan more than one destination, and durable materials (brass or corrosion-resistant plastics) that hold up to daily use. Confirm that the kit’s threads and connectors match your faucet’s outlet size and that washers and sealing gaskets are included. It’s also wise to check the flow rating and whether the diverter requires additional hoses or adapters. This planning step reduces post-install leaks and ensures you get a stable, long-lasting connection. As you plan, note where each destination will connect (sprayer, dishwasher line, or filtration line) and ensure you have clearance under the sink or behind the faucet for routing hoses neatly.
Safety and prep: shutting off water and protecting surfaces
Before touching any plumbing components, shut off the relevant water supply valves to avoid sprays of water. Use a bucket and towels to catch residual water and protect cabinetry and countertops from spills. If your home has multiple shutoffs, start with the valve for the faucet you’re working on. Wear eye protection and avoid forcing any fittings; if threads feel stuck, back off and re-check alignment rather than forcing a seal. Keep a work light handy to inspect threads and gaskets closely, and lay out all parts on a clean workspace to prevent losing small components.
How diverters connect to the faucet and supply lines
Most diverters attach to the faucet outlet with threaded connections and then route water to one or more hoses. You’ll typically remove the existing aerator or outlet hose and replace it with the diverter body, using washers and gaskets to seal each joint. Apply plumber’s tape (PTFE/tap) to threaded connections to ensure a watertight seal, then snug fittings by hand and finish with a wrench—protect the faucet finish with a cloth or sleeve. After assembly, connect the diverter’s outlets to the appropriate hoses or sprayer line, ensuring there’s no kinked hose or clearance conflicts with cabinet hardware. A final check with the water off confirms that all components are seated correctly before you restore pressure.
Common installation challenges and troubleshooting
Leaks are usually due to cross-threading, misaligned gaskets, or over-tightening. If a leak appears at a joint, loosen, reseat the gasket, and re-tighten with a cloth protection sleeve to avoid marring the finish. If you cannot get a good seal, you may need a different diverter model or an additional adapter to match the faucet outlet. Some faucets have tight tolerances on their spout threads, so avoid forcing a diverter that doesn’t align. Always re-check the system with the water off after reassembling, and then run a slow test with the water on to verify that the diverter routes water correctly without leaking at any joint. The Faucet Fix Guide team recommends documenting your setup and keeping spare washers and PTFE tape on hand for future adjustments.
Maintenance tips to extend diverter life
To keep your diverter functioning well, clean mineral deposits from outlets periodically with a soft brush and vinegar solution if mineral buildup is present. Inspect connections monthly for signs of wear or looseness and re-seat gaskets as needed. Avoid using harsh chemical cleaners that could degrade seals or hoses. When you notice reduced flow to an outlet, check for kinked hoses, collapsed washers, or partially blocked ports. Regular maintenance minimizes unexpected leaks and ensures your setup remains reliable over time. Faucet Fix Guide emphasizes habitually inspecting for wear and replacing worn components promptly to maintain performance.
AUTHORITY SOURCES
For further reading and safety considerations, consult these external resources:
- https://www.epa.gov/watersense (U.S. Environmental Protection Agency – WaterSense program)
- https://extension.oregonstate.edu/ (Oregon State University Extension – Home and Garden Plumbing tips)
- https://extension.psu.edu/ (Penn State Extension – DIY Plumbing and Maintenance)
Tools & Materials
- adjustable wrench(8–12 inch range for accessibility)
- channel-lock pliers(Grip and stabilize fittings)
- PTFE plumber’s tape(Wrap clockwise 2-3 times)
- diverter kit (with adapters)(Ensure it matches faucet outlets)
- washers and gaskets (included in kit)(Check for wear and replace if cracked)
- bucket and towels(Catch drips and protect surfaces)
- soft cloth or sleeve to protect finish(Prevent scratches during tightening)
- thread sealant or silicone (optional)(Only if recommended by kit instructions)
- screwdriver set (flat and Phillips)(For any hose clamps or screws)
- flashlight / headlamp(Inspect tight spaces clearly)
- replacement aerator (optional)(If removing aerator without diverter-compatible adapter)
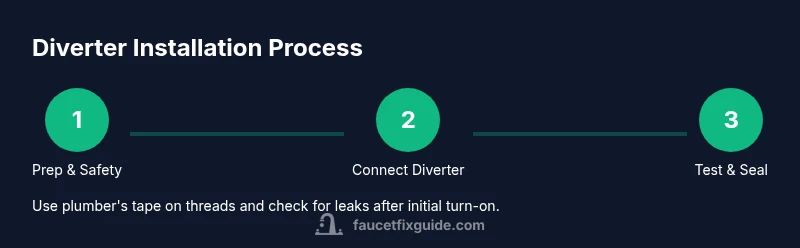
Steps
Estimated time: 45-60 minutes
- 1
Shut off the water supply
Locate the faucet’s shutoff valves under the sink and turn them clockwise until they stop. If you cannot close the valves completely, shut off the main house supply. Open the faucet to relieve pressure and confirm there is no dripping from other fixtures.
Tip: Having a towel ready catches any residual water and protects surfaces; wipe the area dry before starting work. - 2
Remove the existing outlet or aerator
Use pliers with a cloth to loosen and remove the aerator or outlet hose from the faucet spout. Inspect the threads and gasket for wear. Keep track of any small washers that come loose and set them aside.
Tip: If threads are tight, apply gentle heat or use two wrenches to avoid marring the finish; always protect the faucet surface. - 3
Prepare the diverter and apply tape
Wrap PTFE tape clockwise around the faucet outlet threads 2–3 times. If your kit includes a gasket, place it correctly on the diverter before threading it onto the faucet. Hand-tighten first, then snug with a wrench while protecting the finish.
Tip: Do not over-tighten; overtightening can crack fittings and create leaks. - 4
Attach the diverter body and ports
Screw the diverter body onto the faucet outlet, ensuring the seals seat evenly. Connect the hoses or spray line to the diverter ports, routing them so they won’t kink or rub against sharp edges.
Tip: Arrange hoses to minimize tension; negative pressure on a kinked hose can cause leaks. - 5
Reconnect supply lines and secure fittings
Re-attach any supply lines you removed, applying PTFE tape to threaded connections if required by the kit. Tighten all fittings by hand, then finish with a wrench while protecting the faucet body.
Tip: Check each joint for even seating; use a gauge or simple finger press to verify signs of uniform compression. - 6
Test the system and check for leaks
Turn the water back on slowly at the shutoff valves. Let the system pressurize, then run water through each outlet to verify that the diverter routes correctly and remains leak-free. If you notice a leak, reseat the gasket or reapply tape as needed.
Tip: Test at low flow first; then gradually increase to normal usage to ensure stability.
Frequently Asked Questions
What is a faucet diverter and what does it do?
A faucet diverter redirects water from the main faucet outlet to additional accessories such as a spray head, dishwasher hose, or filtration line. It helps you manage multiple water destinations without installing a second faucet.
A faucet diverter redirects water from the faucet to extra accessories, letting you run a spray head or dishwasher hose without a second faucet.
How do I know which diverter to buy for my faucet?
Check the faucet outlet type, measure available space, and confirm that the diverter kit includes adapters compatible with your faucet brand. Look for kits with clear installation instructions and solid gasket components.
Check your faucet outlet type, space, and the kit’s adapters; choose a kit with good seals and clear instructions.
Do I need special tools to install a faucet diverter?
Most installations require only basic hand tools: an adjustable wrench, PTFE tape, and possibly pliers. Some kits include everything needed, reducing the tool set you’ll require.
Usually you’ll need basic tools like a wrench and PTFE tape; many kits include everything you need.
What should I do if I see a small leak after installation?
Shut off water, inspect the affected joint, reseat the gasket, re-tape the threads, and re-tighten gently. If leaks persist, verify compatibility or try a different diverter model.
If a leak appears, recheck seals and seating, then try again; if it continues, check compatibility or try another diverter.
How often should I maintain a faucet diverter?
Periodically inspect for wear on seals and hoses, clean mineral buildup from outlets, and replace worn parts as needed. Regular checks help prevent sudden leaks.
Inspect seals and hoses regularly and clean mineral buildup to prevent leaks.
Watch Video
Top Takeaways
- Verify compatibility before purchase to avoid leaks.
- Use PTFE tape on threads and seal joints properly.
- Test gradually and inspect every joint for leaks.
- Route hoses to prevent kinks and movement.
- Maintain components with periodic checks and replacements.