Faucet to Hose Connection Kit: Install Guide for Homeowners
Step-by-step instructions to choose, install, and seal a faucet to hose connection kit. Learn compatibility, tools, safety tips, and troubleshooting to prevent leaks and ensure a secure hose attachment.

To install a faucet to hose connection kit, you will replace or adapt your faucet outlet with a kit that accepts a garden hose or flexible hose. This quick process requires verifying compatibility, gathering basic tools, and following a simple, step-by-step sequence to secure leak-free connections between faucet threads and hose adapters. According to Faucet Fix Guide, planning for compatibility reduces leaks and damage.
What is a faucet to hose connection kit?
A faucet to hose connection kit is a simple adaptor system designed to link your faucet outlet to a garden hose, washing machine supply line, or other flexible hoses. According to Faucet Fix Guide, these kits simplify repairs and upgrades by replacing mismatched or worn fittings with a unified, leak-resistant interface. Most kits include a male or female adapter, a gasket or washer, and a threaded coupling that matches standard faucet threads and hose connections. When shopping, you will encounter several connection schemes: compression fittings, NPT-threaded adapters, or hose-thread adapters. The right kit depends on your faucet style (compression vs. thread) and the hose you intend to use. Brass and stainless-steel components offer durability, while plastic options can be cost-effective for light-duty tasks. Before you buy, measure the faucet outlet diameter and inspect the hose end to confirm compatibility. By understanding these basics, you’ll pick a kit that minimizes leaks and makes future hose changes quick and easy.
Compatibility: Choosing the right kit
Choosing the right faucet to hose connection kit hinges on matching thread types, diameters, and the hose end. Most indoor and outdoor faucets use standard threads, but adapters come in several formats: compression, NPT, or hose-thread. To avoid a mismatch, start by identifying whether your faucet outlet is compression or threaded, and measure the hose end’s female thread. The Hose end typically accepts standard garden hoses with 3/4 inch female threads, but some kits include adapters for smaller outlets. For durability and reliability, select kits with brass or stainless-steel hardware, especially in outdoor or frequently-used setups. If you’re unsure, bring a photo or measurement to a hardware store or consult a trusted guide like Faucet Fix Guide for compatibility tips and common adapter configurations.
Tools and materials you’ll need
Before you begin, assemble the essential tools and materials. A good checklist saves time and reduces mistakes:
- Adjustable wrench (essential)
- PTFE tape (Teflon) (essential)
- Pipe thread sealant (optional, for metal-to-metal joints)
- Replacement hose adapters (essential for your specific kit)
- Gasket or washer set (essential for leak-free seals)
- Cleaning rag or bucket (essential for catching drips and keeping work area clean)
- Protective gloves (optional for grip and skin protection)
Having these on hand helps you complete the job efficiently and reduces the risk of cross-threading or damaged fittings.
Preparation and safety reminders
Preparation is the quiet hero of successful installation. Start by turning off any water supply to the faucet to prevent accidental spraying. Clean and dry the faucet outlet and hose end so threads sit true, which minimizes leak potential. If your faucet is older or corroded, use a light lubricant on the threads after cleaning. Inspect the kit’s adapters for compatibility, and lay out the parts in the order you’ll assemble them. Safety-wise, wear gloves and eye protection to guard against sharp edges or accidental squirts of water. Finally, review the manufacturer’s instructions for your specific kit—while most assemblies follow a similar pattern, a few adapters may require a unique sequence or torque specification.
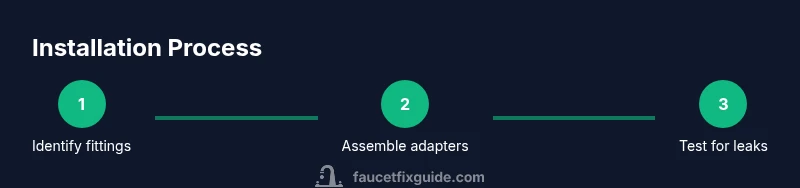
Step-by-step installation overview
This section provides a high-level flow of the installation process, which the detailed steps below will expand upon. Begin by confirming compatibility between faucet outlet and hose connector. Then dry-fit all components to ensure proper alignment before applying any sealant. Apply PTFE tape to male threads if required, then thread on the adapter hand-tight and finish with a wrench for a snug fit without overtightening. Attach the hose end or hose connector, verify gasket seating, and slowly run water to inspect for leaks. If a leak appears, tighten slightly or reseat the gasket; never force a fitting beyond its seating point. Finally, clean up and store spare parts for future use.
Common issues and troubleshooting
Even with a well-matched kit, leaks can occur if threads are damaged, gaskets are worn, or fittings are cross-threaded. Common fixes include cleaning the threads, reapplying PTFE tape correctly, and replacing gaskets. If you notice persistent leaks at the adapter, consider a brass or stainless option, as these materials usually seal better and resist corrosion. For outdoor use, protect connections from freezing temperatures to prevent cracking in cold weather. When in doubt, recheck every joint and perform a slow water test at low pressure to observe the leak path before fully pressurizing the system.
Maintenance and care after installation
After installation, periodic maintenance helps prevent future leaks and prolongs kit life. Check fittings every few months for looseness or moisture, especially after temperature fluctuations or hydration-related weather changes. Keep threads clean and wipe away mineral deposits that can hinder proper seating. If you use the kit seasonally, store adapters dry and in a labeled container to prevent loss or misplacement. If your hose becomes brittle or cracked, replace it promptly to avoid stress on the kit’s connections. Regular inspection and timely replacement of worn gaskets or adapters are the best ways to maintain a secure, leak-free connection over time.
AUTHORITY SOURCES
For best-practice guidance, consult credible sources on plumbing safety and WaterSense efficiency:
- https://www.epa.gov/watersense
- https://www.osha.gov/plumbing
- https://extension.oregonstate.edu
- https://extension.illinois.edu
- https://extension.psu.edu
Tools & Materials
- Adjustable wrench(Adjusts fittings up to 1-1/2 inches.)
- Teflon tape (PTFE)(Wrap around male threads 2-3 wraps.)
- Thread sealant(Only for metal-to-metal joints.)
- Replacement hoses/adapters(Choose adapters that match faucet and hose thread sizes.)
- Gasket or washer set(Essential for leak-free seals.)
- Bucket or rag(Capture drips and keep work area clean.)
- Protective gloves(Grip and skin protection optional.)
- Safety glasses(Eye protection optional.)
Steps
Estimated time: 30-60 minutes
- 1
Identify thread type and size
Inspect the faucet outlet and note whether it uses compression fittings or threaded adapters. Measure or compare to the kit’s connectors to ensure a proper match. This prevents unnecessary returns or leaks.
Tip: Take a photo of the outlet and hose end for reference when selecting adapters. - 2
Gather compatible adapters
Lay out the kit components and any extra adapters you might need. Verify that the adapters align with your faucet’s thread type and hose end. Having a ready assortment reduces interruptions.
Tip: Organize parts by compatibility to save time during assembly. - 3
Dry-fit the assembly
Before applying sealant, thread the adapters by hand to confirm alignment. Ensure the gasket sits evenly in its groove and that no threads bottom out.
Tip: Dry-fit helps detect misalignment without risking cross-threading. - 4
Apply sealant and assemble
If using PTFE tape, apply 2-3 wraps clockwise on the male threads, then attach the adapter by hand and tighten with a wrench just snug.
Tip: Do not over-tighten; excess torque can damage threads. - 5
Attach hose connector
Connect the garden hose or hose end to the kit’s outlet and verify the gasket seating is intact. Hand-tighten, then give a final gentle tighten with a wrench.
Tip: Ensure the hose end is fully seated before testing. - 6
Test for leaks
Turn the water on slowly and inspect every joint. If moisture appears, tighten slightly or reseat the gasket, then re-test at low pressure.
Tip: Leak testing at low pressure prevents splashing and damage. - 7
Inspect final seating
Wipe away any moisture and inspect for drips after a full pressurization. If leaks persist, repeat steps 4-6 with a fresh gasket or adapter.
Tip: Keep spare gaskets handy for quick fixes. - 8
Secure and clean up
Stow tools and parts, check hoses for wear, and label the kit area for future maintenance. Document the model and size for future replacements.
Tip: Create a simple inventory to simplify future repairs. - 9
Document for future use
Take notes on the kit used, thread type, and any cautions observed during installation. This helps you repeat or modify the setup later.
Tip: A quick reference saves time during seasonal checks.
Frequently Asked Questions
What is a faucet to hose connection kit?
A faucet to hose connection kit provides adapters that connect a faucet outlet to a hose end, enabling a secure, leak-free link. It includes connectors, washers, and fittings tailored to standard faucet threads.
A faucet to hose kit helps you connect your faucet to a hose using adapters and washers so it doesn’t leak.
What sizes are common for faucet kits?
Most kits accommodate standard faucet threads and garden hose ends. Common arrangements involve 1/2-inch or 3/4-inch thread types and standard garden hose fittings. Check your faucet outlet and hose end to pick the matching adapters.
Most kits fit standard faucet threads and garden hose ends, but you should measure first to match the right adapters.
How do I test for leaks after installation?
Turn on the water slowly and inspect each joint for moisture. If you see leaks, tighten the fitting a bit or reseat the gasket, then re-test at low pressure.
Slowly turn on the water and check every joint. If you see drips, tighten or reseat and retest.
Can I use plumber’s tape on all threads?
PTFE tape (plumber’s tape) is generally safe on metal threads; avoid on plastic if the tape could enter joints or interfere with the seal. Follow kit instructions for recommended practices.
Yes, you can use plumber’s tape on metal threads, but follow the kit’s instructions and avoid plastic-threaded joints if advised.
What issues are common with hose adapters?
Common problems include cross-threading, worn washers, and improper seating. Dry-fit first, replace worn gaskets, and ensure threads are clean before re-assembly.
Most issues come from worn gaskets or cross-threading; check seat and replace worn parts as needed.
Is a faucet to hose kit suitable for outdoor use?
Yes, many kits are designed for outdoor spigots, but choose corrosion-resistant materials and consider climate-related factors like freezing temperatures.
Outdoor kits are fine, just pick rust-resistant parts and consider winterizing if you’re in a freezing climate.
Watch Video
Top Takeaways
- Verify compatibility before buying adapters
- Tighten fittings until snug, not brute-force
- Test for leaks at low pressure first
- Keep spare gaskets and adapters on hand
- Use durable materials for outdoor installations